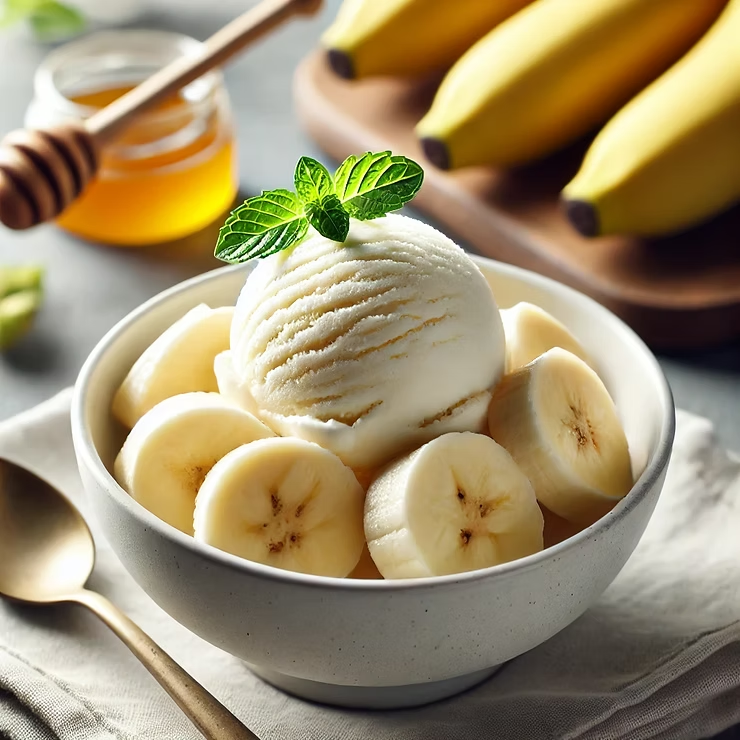
Who doesn’t love a creamy bowl of ice cream? But what if you could enjoy a delicious, creamy treat without any eggs or heavy ingredients? This simple recipe for homemade banana ice cream without eggs is the perfect solution! Not only is it incredibly easy to make, but it’s also a healthier option that doesn’t compromise on flavor.
Why I Love Homemade Banana Ice Cream Without Eggs
This recipe is perfect for those who prefer to skip eggs due to allergies, dietary preferences, or simplicity. Plus, bananas are naturally sweet and creamy, making them an excellent base for ice cream. Whether you’re vegan, dairy-free, or just looking for a quick dessert, this recipe is a must-try.
Ingredients You’ll Need
You only need a few simple ingredients to whip up this refreshing treat:
4 ripe bananas (frozen for at least 4 hours)
1 cup of milk or non-dairy alternative (like almond, oat, or coconut milk)
1-2 tablespoons of honey, maple syrup, or agave (optional, for added sweetness)
1 teaspoon of vanilla extract
Step-by-Step Instructions
1. Freeze the Bananas
Peel the bananas, slice them into coins, and place them in an airtight container. Freeze for at least 4 hours or overnight.
2. Blend the Ingredients
Add the frozen banana slices, milk (or non-dairy alternative), sweetener (if using), and vanilla extract into a blender or food processor. Blend until smooth and creamy. If the mixture is too thick, add a splash of milk to help it blend.
3. Serve Immediately or Freeze for Later
For a soft-serve consistency, serve the ice cream immediately. If you prefer a firmer texture, transfer the mixture to a container and freeze for an additional 1-2 hours.
Customizations and Variations
Chocolate Banana Ice Cream: Add 2 tablespoons of cocoa powder for a rich, chocolatey twist.
Nutty Banana Ice Cream: Mix in a handful of crushed nuts or a swirl of peanut butter.
Berry Banana Ice Cream: Add a cup of frozen berries to the blender for a fruity flavor.
Toppings Galore: Sprinkle your ice cream with chocolate chips, shredded coconut, or granola for extra texture and flavor.
Tips for Perfect Banana Ice Cream
Use ripe bananas for maximum sweetness.
A high-speed blender or food processor works best for achieving a creamy texture.
Freeze the ice cream in a shallow container for faster firming.
For easy scooping, let the ice cream sit at room temperature for 5 minutes before serving.
Why You’ll Love This Recipe
Making homemade banana ice cream without eggs is not only easy and budget-friendly but also a great way to enjoy a healthier dessert. It’s naturally sweet, customizable, and perfect for cooling off on a warm day. Plus, it’s a fun recipe to make with kids!
Conclusion
If you’re looking for a simple, delicious, and egg-free dessert, this banana ice cream recipe is a must-try. It’s creamy, versatile, and packed with natural sweetness, making it a favorite for everyone.
Try it today and let us know your favorite flavor variations in the comments!
Rainy days can be a challenge when you have energetic preschoolers at home, but they’re also a great opportunity for creative and fun indoor activities. With a little imagination and some simple supplies, you can turn a dreary day into an adventure your preschoolers will love. Here are some easy rainy day activities for preschoolers that are sure to keep them entertained.
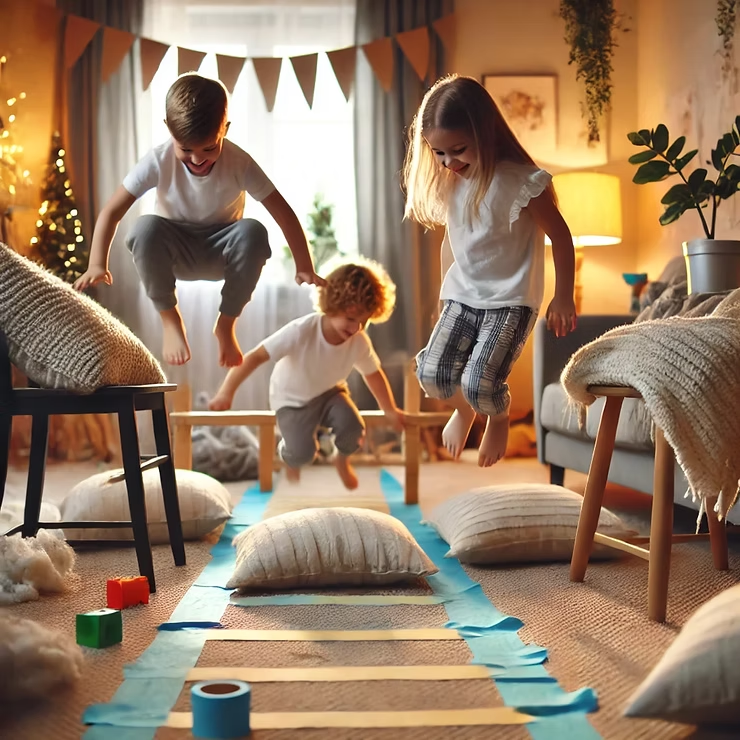
1. DIY Indoor Obstacle Course
Transform your living room into a fun obstacle course!
What You’ll Need:
Pillows
Blankets
Chairs
Masking tape
How to Do It:
Set up an obstacle course with pillows to hop over, chairs to crawl under, and masking tape to create a “balance beam.” Encourage your preschooler to navigate the course in different ways, like hopping, crawling, or walking backwards.
Why It’s Fun:
It’s an active way to burn off energy while improving motor skills.
2. Finger Painting Fun
Let their creativity run wild with finger painting.
What You’ll Need:
Washable paints
Large sheets of paper
Aprons or old shirts
How to Do It:
Spread out a large piece of paper, pour washable paint into trays, and let your preschooler explore colors and textures with their hands.
Why It’s Fun:
It’s messy but oh-so-satisfying and great for sensory play.
3. Build a Blanket Fort
Create a cozy hideaway together.
What You’ll Need:
Blankets
Pillows
Fairy lights (optional)
How to Do It:
Drape blankets over chairs or tables to make a fort. Fill it with pillows and soft toys, and add fairy lights for extra magic.
Why It’s Fun:
It’s a simple way to spark their imagination and provide a cozy spot for reading or pretend play.
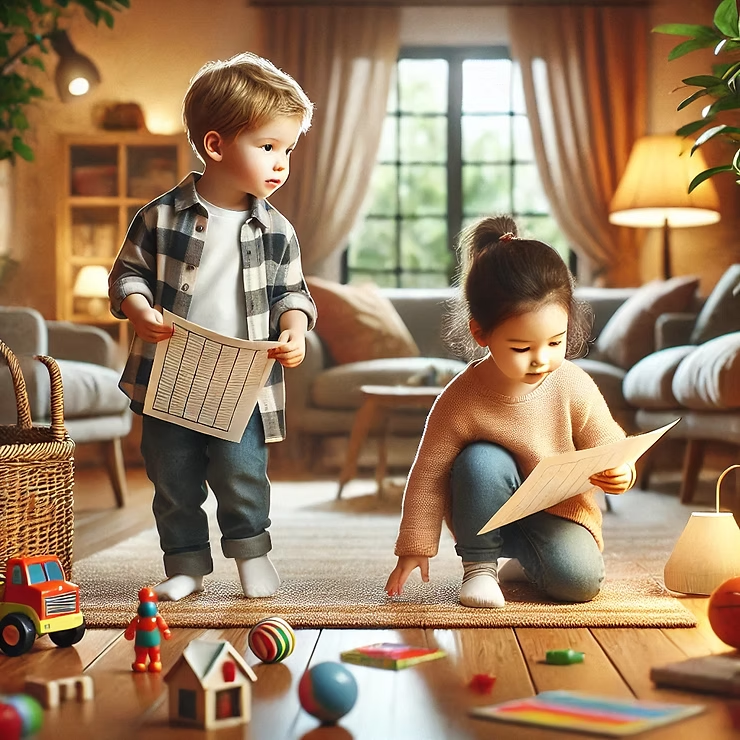
4. Indoor Scavenger Hunt
Turn your home into a treasure hunt.
What You’ll Need:
A list of items to find (e.g., a red sock, a stuffed animal, a book with a blue cover)
How to Do It:
Create a list of easy-to-find items and let your preschooler hunt around the house. For extra fun, hide small surprises along the way.
Why It’s Fun:
It’s engaging and encourages problem-solving skills.
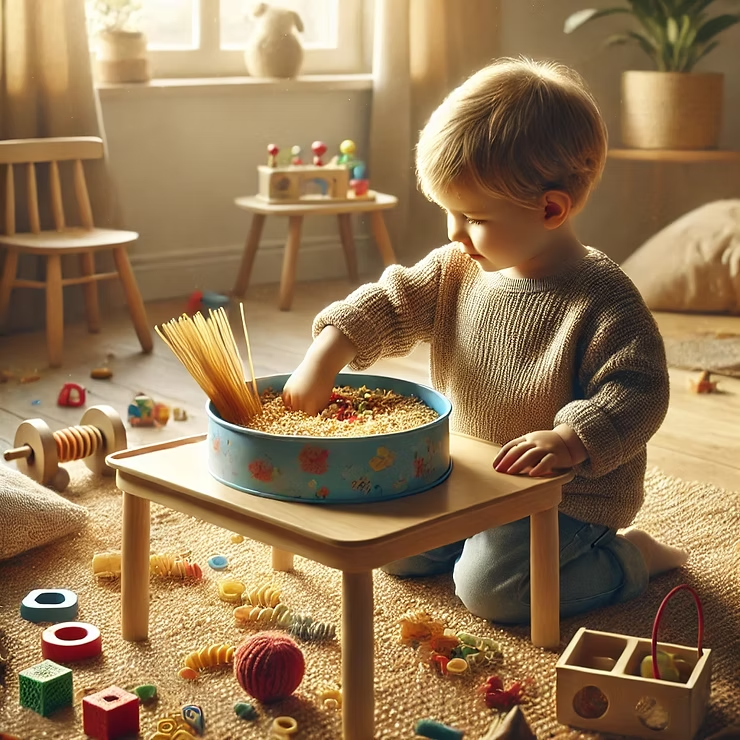
5. Sensory Bin Play
Dive into hands-on exploration.
What You’ll Need:
A large plastic bin
Rice, beans, or pasta
Small toys or tools like scoops and cups
How to Do It:
Fill the bin with a sensory material and hide small toys inside. Provide scoops and cups for pouring and digging.
Why It’s Fun:
It’s a calming and immersive activity that enhances fine motor skills.
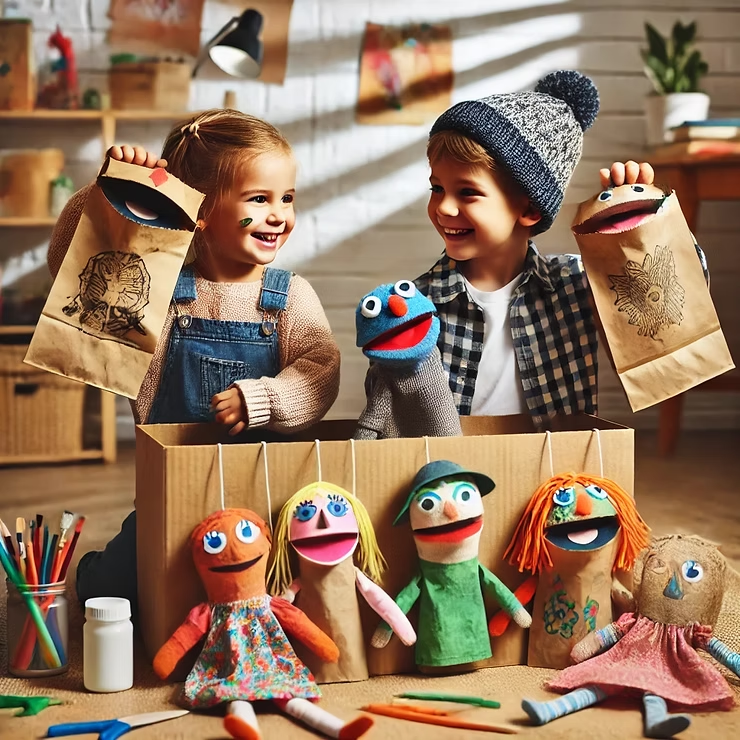
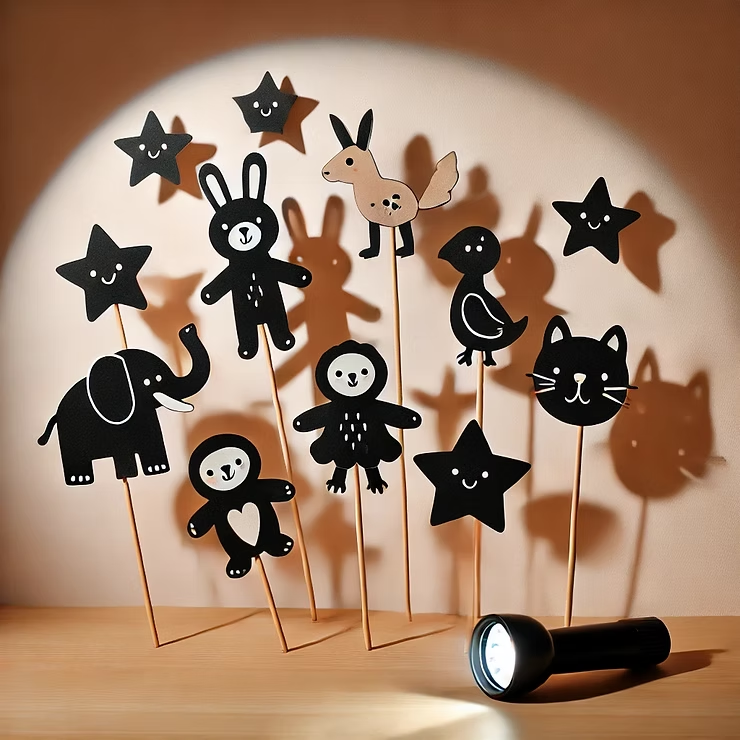
6. Puppet Show Theater
Put on a show with homemade puppets.
What You’ll Need:
Socks or paper bags
Markers and craft supplies
How to Do It:
Make simple puppets using socks or paper bags, decorate them, and then act out a story together.
Why It’s Fun:
It’s a wonderful way to encourage creativity and storytelling.
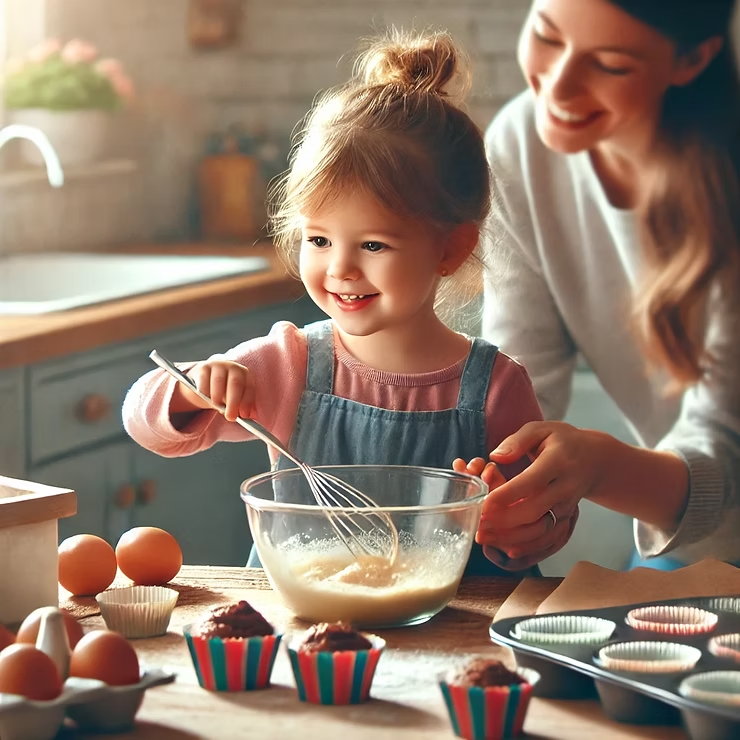
7. Baking Together
Whip up something delicious.
What You’ll Need:
A simple recipe (e.g., cookies or muffins)
Kid-friendly tools
How to Do It:
Choose a simple recipe and let your preschooler help with mixing, measuring, and decorating.
Why It’s Fun:
It’s educational and delicious, with the bonus of teaching life skills.
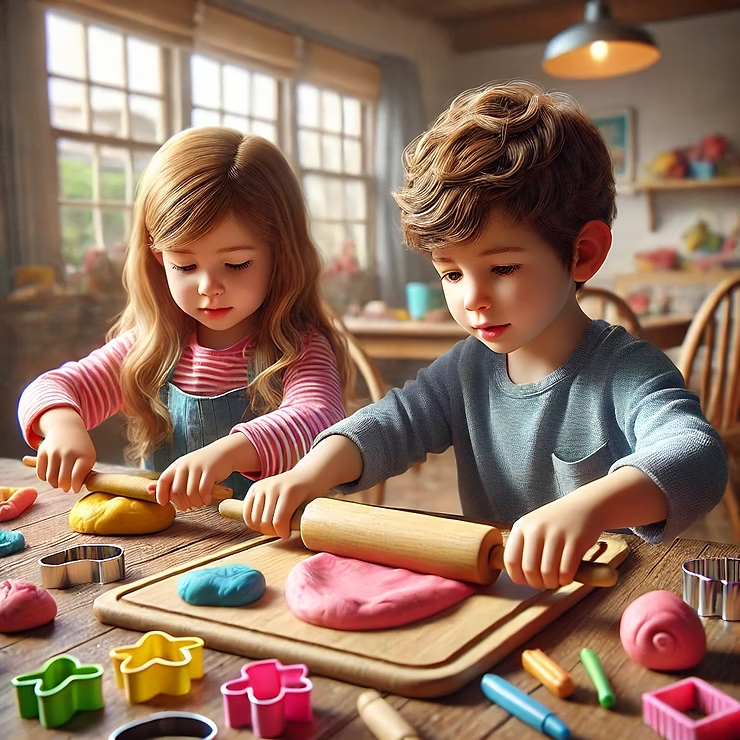
8. DIY Playdough Fun
Make and play with homemade playdough.
What You’ll Need:
Flour, salt, water, and food coloring
How to Do It:
Mix flour, salt, water, and food coloring to create your own playdough. Provide cookie cutters and other tools for added fun.
Why It’s Fun:
It’s tactile and creative, and making it together is half the fun.
Conclusion
Rainy days don’t have to be dull when you have these easy rainy day activities for preschoolers ready to go. From creative crafts to active games, these ideas will keep your little ones entertained and engaged, no matter the weather.
Which activity will you try first? Let us know in the comments below!
Parshas Mikeitz is filled with vivid imagery and meaningful lessons, from Pharaoh’s dreams to Yosef’s rise to power. These creative crafts help kids connect to the stories in a fun and engaging way. Here are some crafts for Parshas Mikeitz that are easy and meaningful to make.
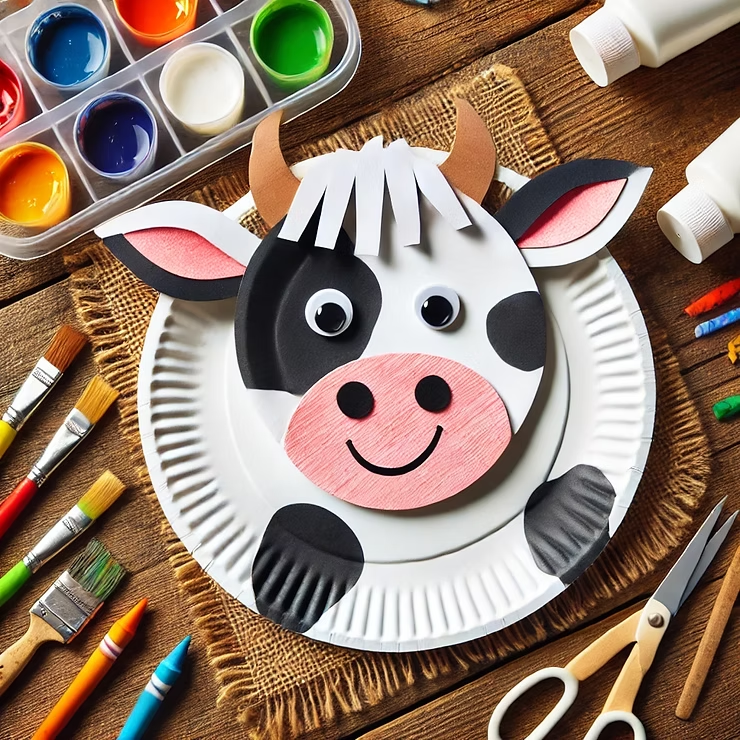
1. Cows of Pharaoh’s Dream Craft
What You’ll Need:
Paper plates
Markers, crayons, or paint
Scissors and glue
How to Make It:
Use paper plates to create cow faces.
Decorate one set of cows as “healthy” with bright colors and a cheerful expression.
Decorate another set as “skinny” cows with darker colors and a tired expression.
Why I Like It: This craft visually represents Pharaoh’s dream and makes it easy to discuss the significance of the imagery.
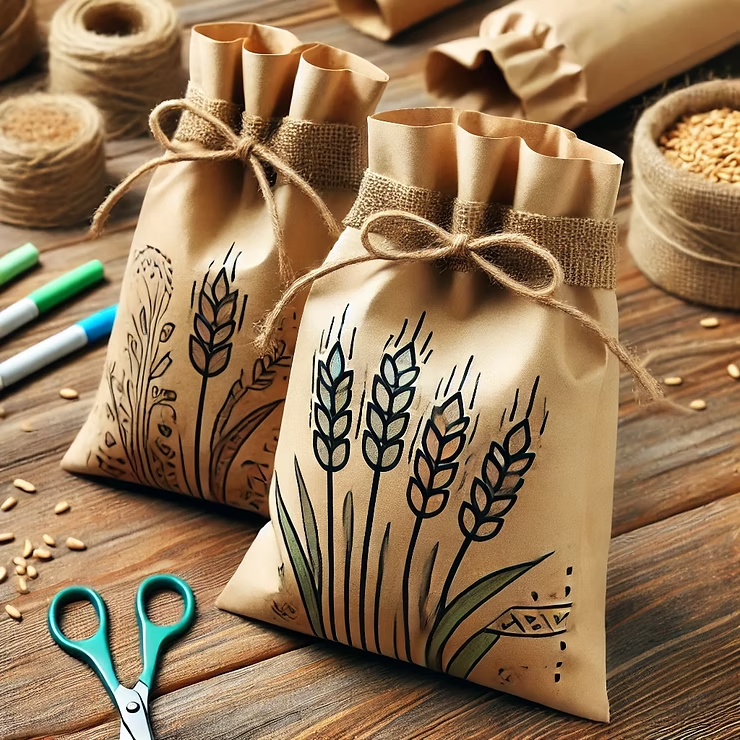
2. Grain Sack Craft
What You’ll Need:
Small brown paper bags
Markers or paint
String or ribbon
How to Make It:
Decorate paper bags to look like grain sacks.
Tie the top with string or ribbon.
Fill the bags with small snacks like popcorn or dried beans to represent the grain.
Why I Like It: It’s simple, hands-on, and ties directly to Yosef’s role in managing Egypt’s resources.
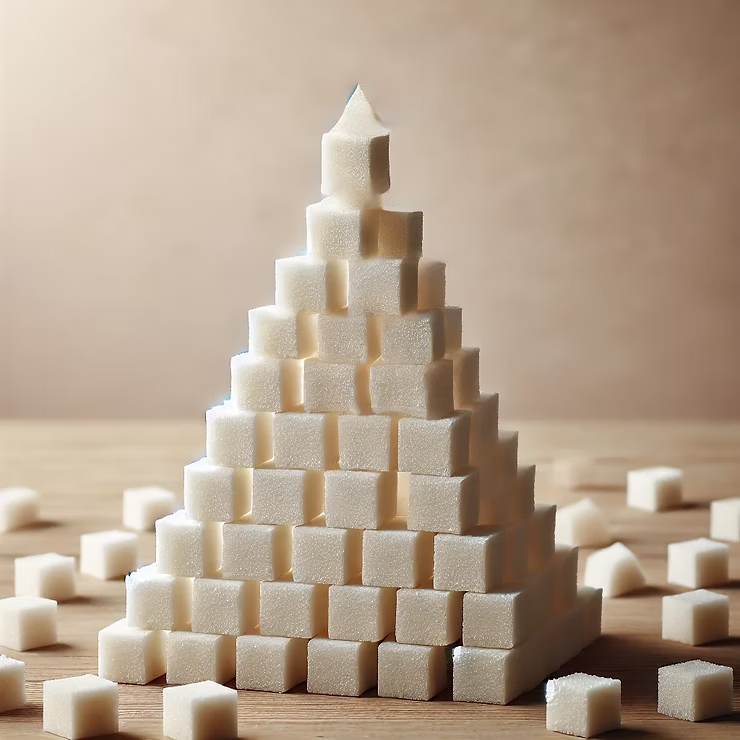
3. Pyramid Building Challenge
What You’ll Need:
Sugar cubes or small building blocks
Glue (optional)
How to Make It:
Challenge kids to build a mini pyramid using sugar cubes or blocks.
Decorate the pyramid with markers or glitter for a festive touch.
Why I Like It: This hands-on activity connects kids to Yosef’s time in Egypt and the grandeur of the civilization he lived in.
Conclusion
Parshas Mikeitz offers rich stories and themes that can inspire meaningful crafts for kids. These creative Parshas Mikeitz crafts are easy to set up and allow children to connect to the Torah through hands-on learning.
Which craft will your family try this week? Share your creations in the comments—we’d love to see them!
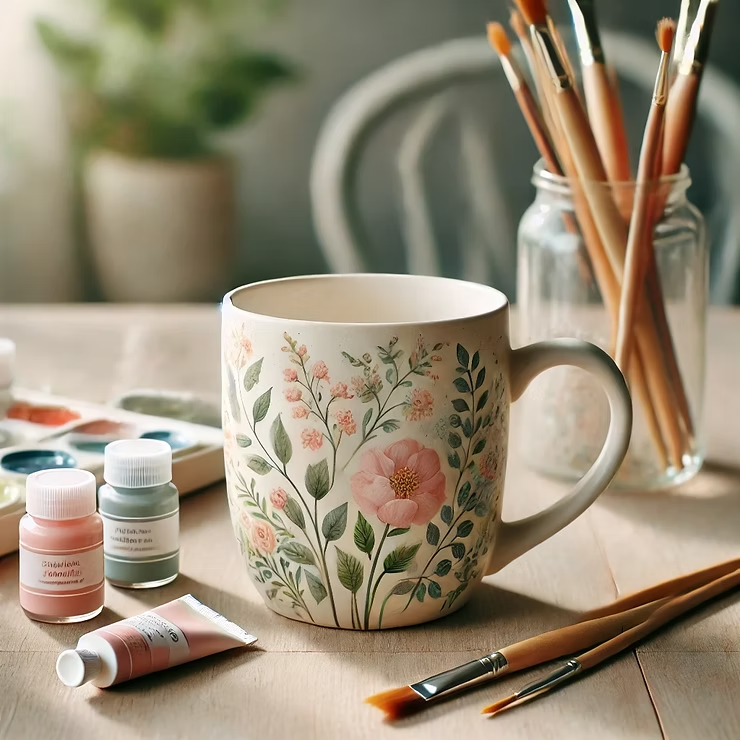
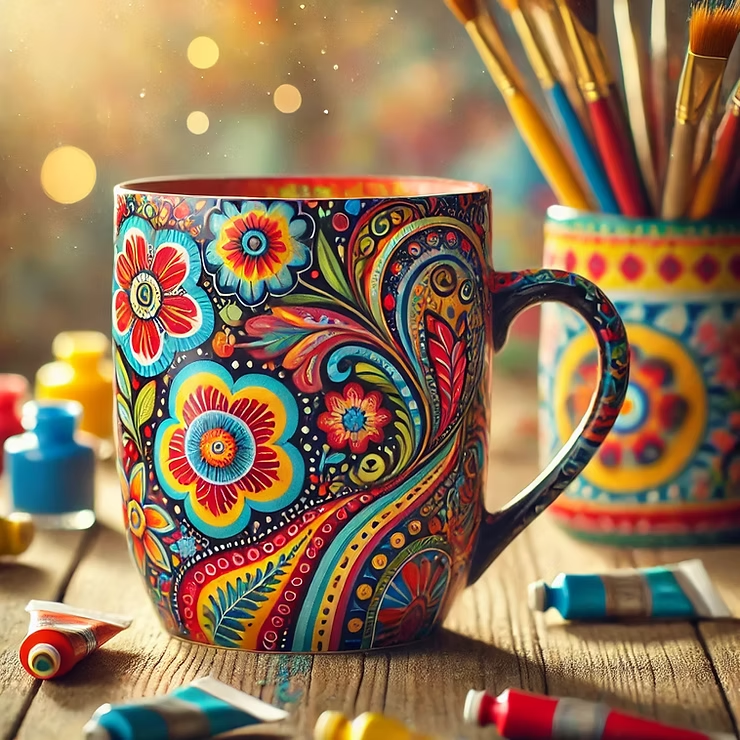
Decorating a ceramic mug is a really fun DIY project that allows you to personalize your drinkware or create unique, thoughtful gifts. Whether you’re a seasoned crafter or just looking for a relaxing activity, this guide will walk you through how to decorate a ceramic mug with ease. Let’s dive into the steps, tips, and creative ideas to make your mug truly one-of-a-kind.
Materials You’ll Need
Before you start, gather the following materials:
A plain ceramic mug (white works best)
Ceramic or oil-based markers
Acrylic paint (optional)
Paintbrushes or sponge brushes
Stencils or masking tape (for designs)
Rubbing alcohol (for cleaning the mug)
An oven (for setting the design)
Step-by-Step Instructions
1. Clean the Mug
Start by cleaning the surface of your ceramic mug with rubbing alcohol and a paper towel. This removes any dirt or grease, ensuring your design adheres properly.
2. Plan Your Design
Decide on your design before starting. Sketch it out on paper or use stencils for precise shapes. Some ideas include:
Geometric patterns
Inspirational quotes
Floral designs
Cute doodles or holiday themes
3. Decorate the Mug
With Markers:
Use ceramic or oil-based markers to draw directly onto the mug.
Let the design dry for a few minutes before adding more details or layers.
With Paint:
Use acrylic paint for bold designs or a sponge brush for smooth coverage.
Mask off areas with tape or use stencils for clean edges.
Let the paint dry between layers to avoid smudging.
4. Set the Design
Once you’re happy with your design, bake the mug to set the decoration:
Place the mug in a cold oven to prevent cracking.
Set the oven to 350°F (175°C) and bake for 30 minutes.
Turn off the oven and let the mug cool completely before removing it.
5. Seal (Optional)
If you want extra durability, apply a dishwasher-safe sealant after baking. Follow the instructions on the sealant and allow it to cure properly.
Creative Tips and Ideas
Layer Colors: Use multiple colors to create depth and dimension.
Add Metallics: Gold or silver accents can give your mug a sophisticated touch.
Personalize It: Add a name, initials, or a meaningful date for a customized gift.
Holiday Themes: Decorate with festive motifs like snowflakes, hearts, or pumpkins.
Use Negative Space: Leave some areas blank to make the design pop.
Caring for Your Mug
To ensure your design lasts, handwashing is best. Avoid abrasive sponges and harsh detergents, even if you’ve sealed the design.
Conclusion
Decorating a ceramic mug is a fantastic way to unleash your creativity and make something functional and beautiful. This simple DIY project is sure to bring you joy. Grab a plain mug, let your imagination run wild, and start decorating today!
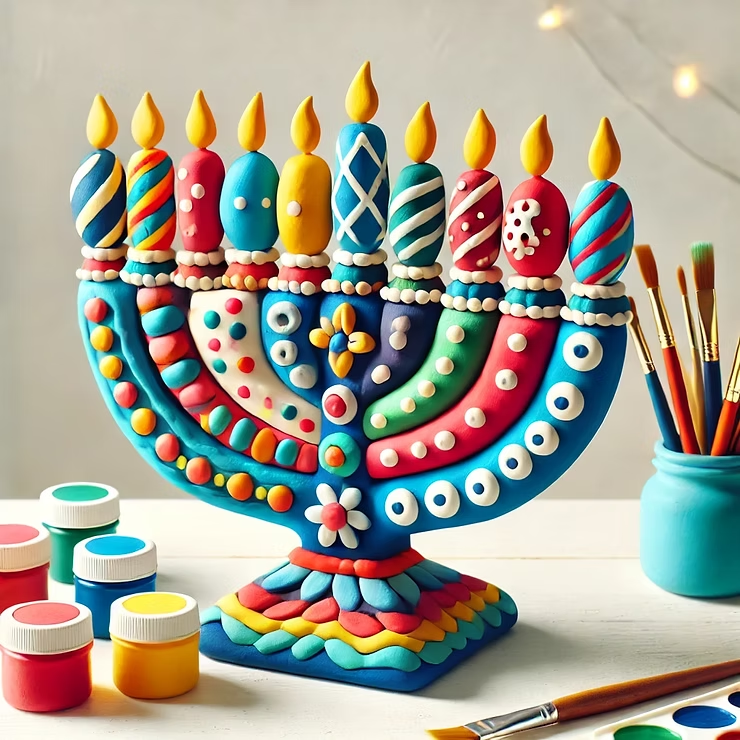
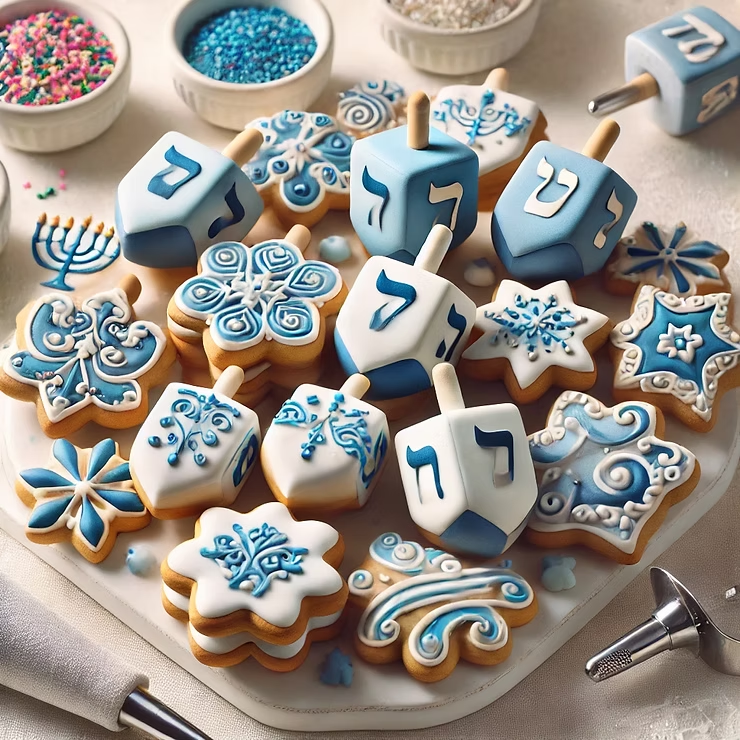
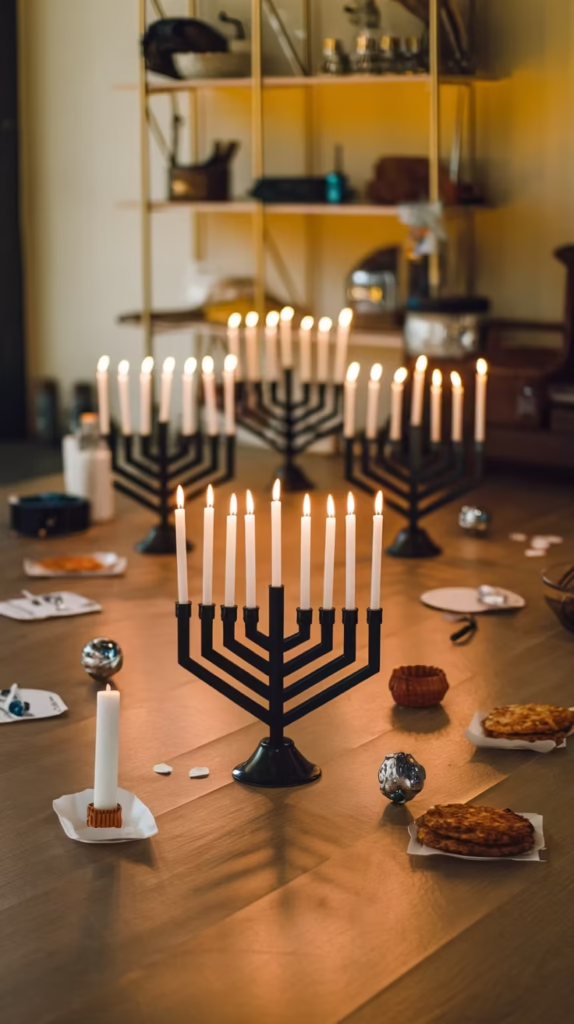
Chanukah, also known as the Festival of Lights, is a time filled with joy, family, and traditions. While lighting the menorah and playing dreidel are classic ways to celebrate, incorporating craft projects into your festivities is a wonderful way to engage kids in the holiday spirit. Here are 10 fun and easy Chanukah craft ideas for kids that will spark their creativity and keep them entertained.
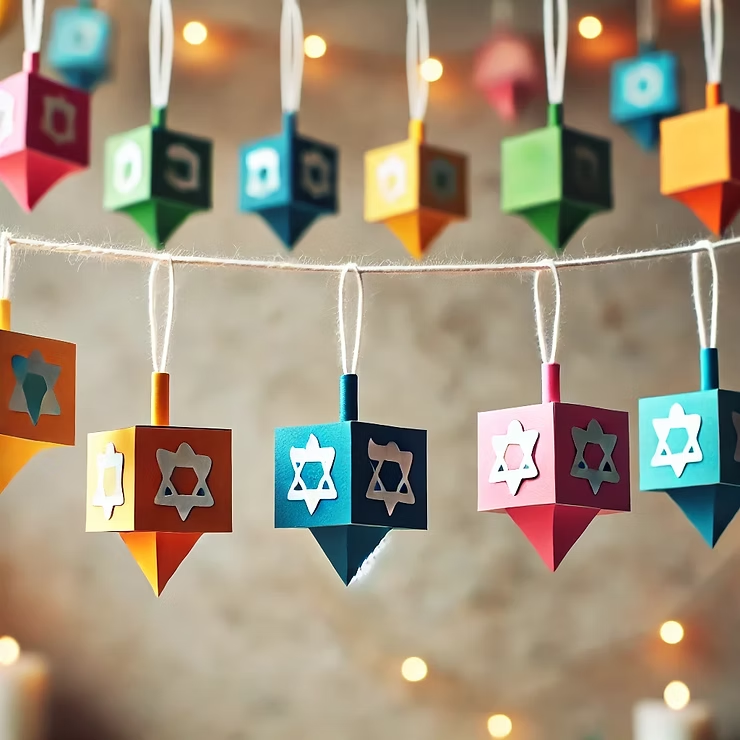
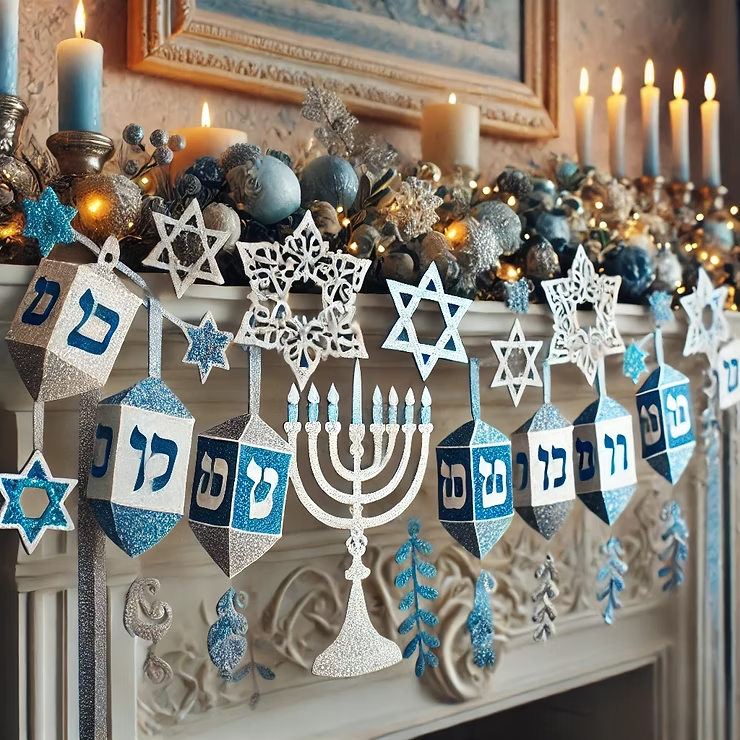
1. DIY Dreidel Garland
Brighten up your home with a colorful dreidel garland. This craft is perfect for younger children and can double as a festive decoration.
What You’ll Need: Construction paper, markers, scissors, and string.
How to Make It: Cut dreidel shapes out of paper, decorate them with Hebrew letters and patterns, then string them together to create a garland. Hang it on a wall or across a window for a charming Chanukah touch.
2. Menorah Handprint Art
Turn your child’s handprints into a keepsake menorah! This simple craft is fun, personal, and perfect for all ages.
What You’ll Need: Paint, paper, and a black marker.
How to Make It: Paint your child’s hand and press it onto paper. Each finger becomes a candle, and you can draw flames above them. Add a heartfelt message or the year to commemorate the project.
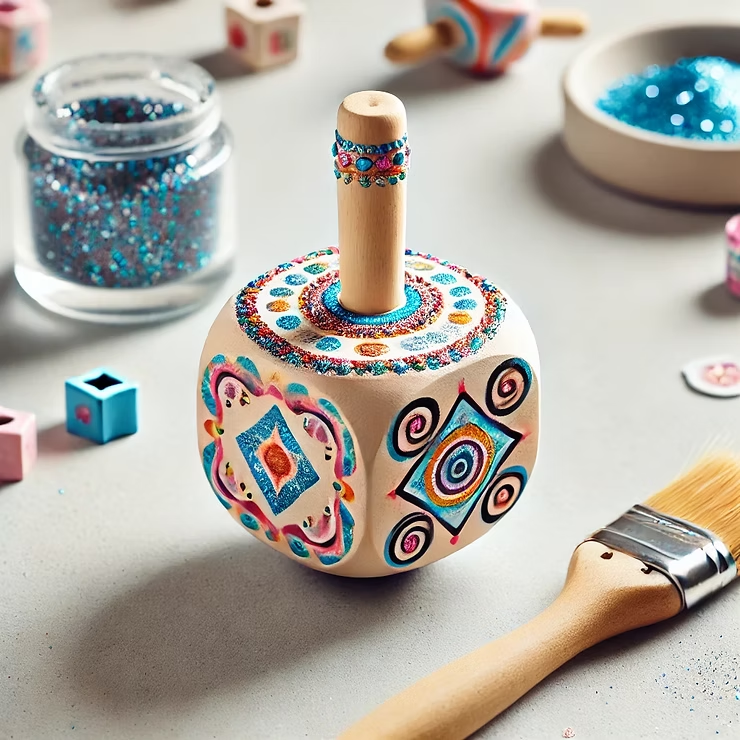
3. Spinning Dreidel Painting
Let your kids turn their dreidels into paintbrushes! This craft combines the fun of spinning dreidels with colorful creativity.
What You’ll Need: Dreidels, paint, and paper.
How to Make It: Dip the tips of dreidels into paint and spin them on paper to create unique patterns and designs.
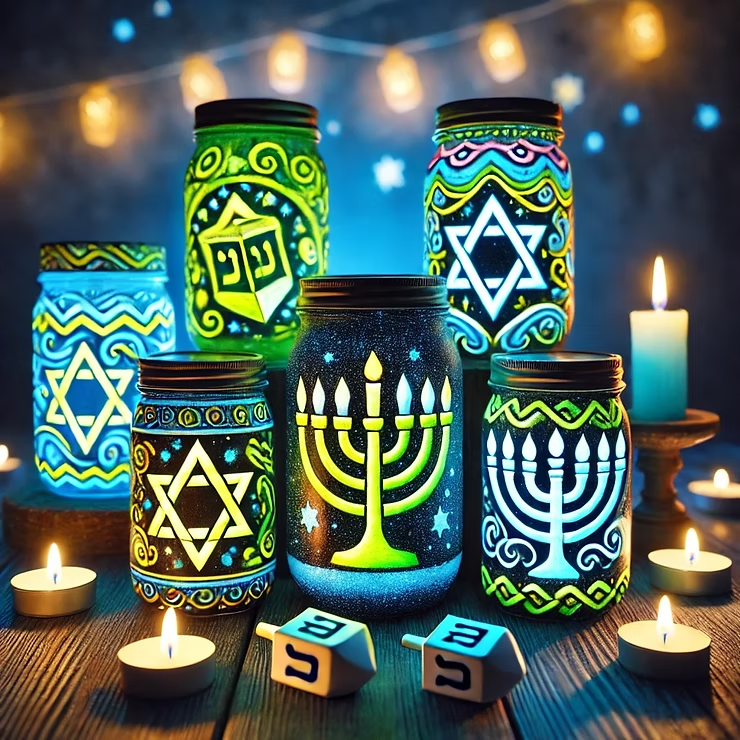
4. Glow-in-the-Dark Chanukah Jars
Light up your Chanukah nights with glow-in-the-dark jars. These make lovely decorations or nightlights.
What You’ll Need: Mason jars, glow-in-the-dark paint, and stickers.
How to Make It: Paint designs or patterns on the jars using glow paint. Add Chanukah-themed stickers for extra flair. Place a small LED light inside to make them glow!
Conclusion
These Chanukah craft ideas for kids are not only fun and creative but also a great way to teach them about the traditions of the holiday. Each activity offers an opportunity to bond with your children and create lasting memories.
Which craft will you try first? Share your ideas or photos of your projects in the comments below! Wishing you and your family a bright and joyful Chanukah!
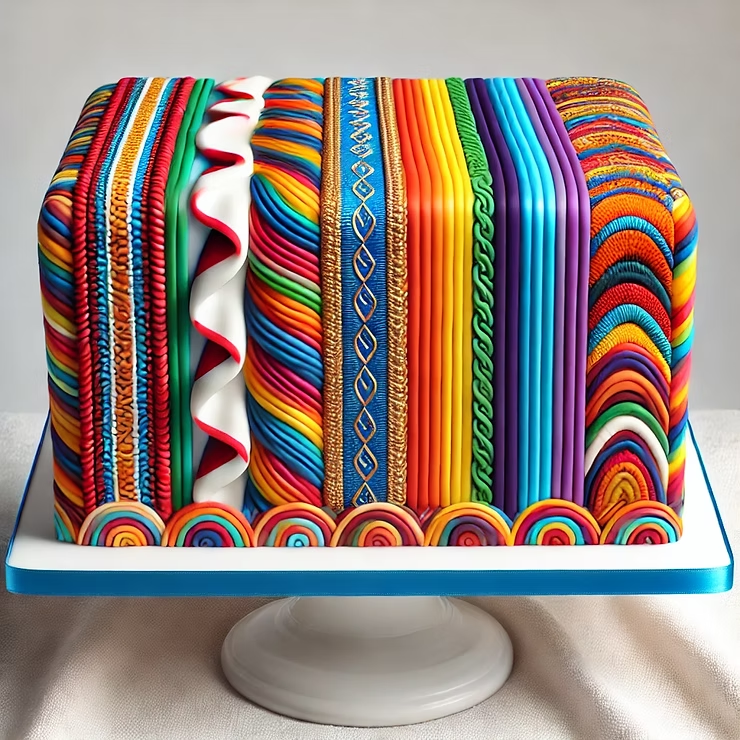
Parshas Vayeshev is filled with vivid imagery and heartfelt stories, from Yosef’s multicolored coat to his dreams and time in Egypt. This week, bring the parsha to life with creative Parshas Vayeshev desserts that not only look beautiful but also connect to the themes of the Torah portion. These treats are fun to make, delicious to eat, and perfect for family learning or Shabbos gatherings.
Bake a rectangular cake and let it cool completely.
Divide your frosting into bowls and color each with food dye.
Spread or pipe the frosting onto the cake in vibrant stripes to resemble Yosef’s coat.
Why I Like It: This dessert is a showstopper and helps kids visualize the special gift Yosef received from his father.
2. Starry Night Sugar Cookies
What You’ll Need:
Star-shaped cookie cutters
Sugar cookie dough
Blue and silver icing
Edible glitter
How to Make It:
Roll out sugar cookie dough and cut out star shapes.
Bake the cookies according to the recipe and let them cool.
Decorate with blue and silver icing, then add edible glitter for sparkle.
Why I Like It: These cookies represent Yosef’s dream of the stars bowing down and are fun for kids to decorate.
3. Dream Cupcakes
What You’ll Need:
Cupcakes
White frosting
Star and moon-shaped sprinkles or edible decorations
How to Make It:
Frost each cupcake with white icing to represent a dreamy sky.
Add star and moon-shaped sprinkles on top.
Optionally, pipe a small sheaf of wheat design with colored icing.
Why I Like It: These cupcakes are easy to make and connect directly to Yosef’s dreams in a creative way.
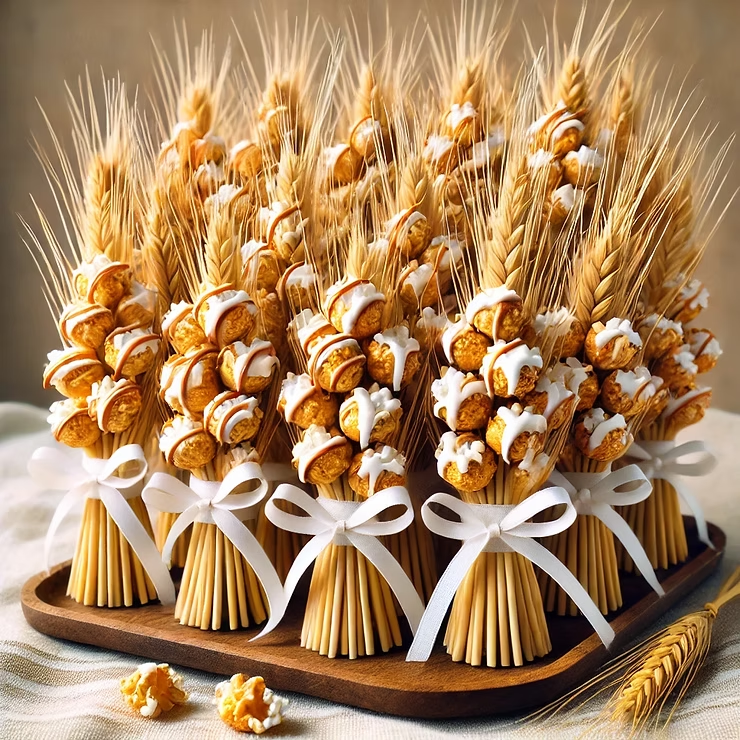
4. Sheaf of Wheat Popcorn Treats
What You’ll Need:
Popcorn
Caramel or melted chocolate
Pretzel sticks
How to Make It:
Form popcorn into small clusters and drizzle with caramel or melted chocolate.
Insert a pretzel stick into each cluster to resemble a wheat stalk.
Arrange them in bundles for a playful nod to Yosef’s dream.
Why I Like It: These treats are a fun mix of sweet and salty, and they look like mini sheaves of wheat.
Conclusion
These creative Parshas Vayeshev desserts bring the parsha to life in sweet and memorable ways. Whether it’s a colorful coat cake or dreamy cupcakes, these treats will make learning extra special. Try one (or all!) of these ideas and let the stories of the Torah inspire your time in the kitchen.
Which dessert will your family make this week? Share your creations in the comments!
Parshas Vayeshev is packed with meaningful stories and lessons, offering countless opportunities for hands-on creativity. From Yosef’s famous multicolored coat to his vivid dreams and dramatic journey, this parsha is perfect for crafts that engage kids and bring the Torah to life. Here are some creative Parshas Vayeshev crafts your kids will love making this week.
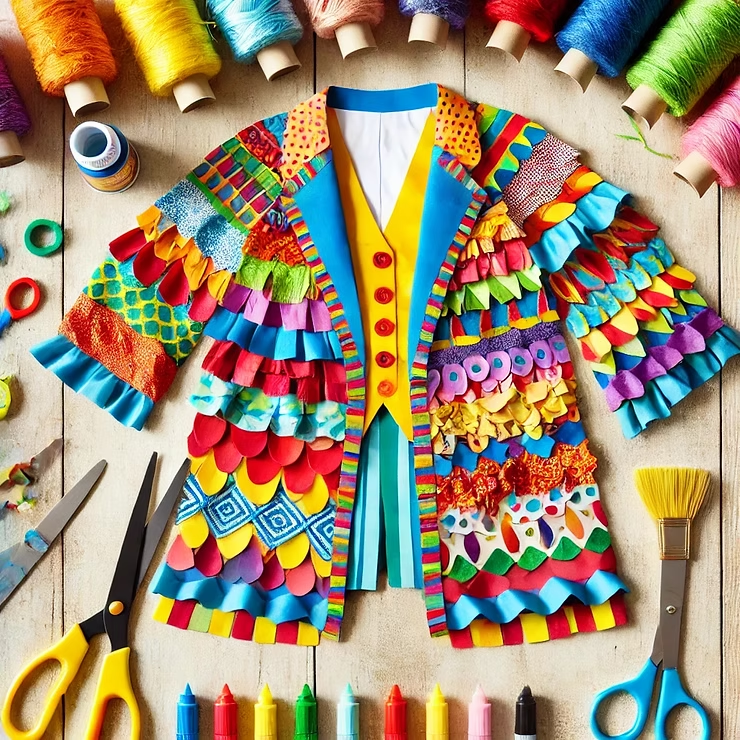
1. Yosef’s Colorful Coat Craft
Bring Yosef’s iconic coat to life with this vibrant activity.
What You’ll Need:
Paper or cardstock
Markers, crayons, or paint
Colorful tissue paper or fabric scraps
Glue
How to Make It:
Cut out a coat shape from cardstock.
Let kids color it with markers or crayons in bright patterns.
Glue on tissue paper or fabric scraps to add texture and vibrancy.
Why I Like It: This simple craft allows kids to visualize and personalize the story of Yosef’s special gift.
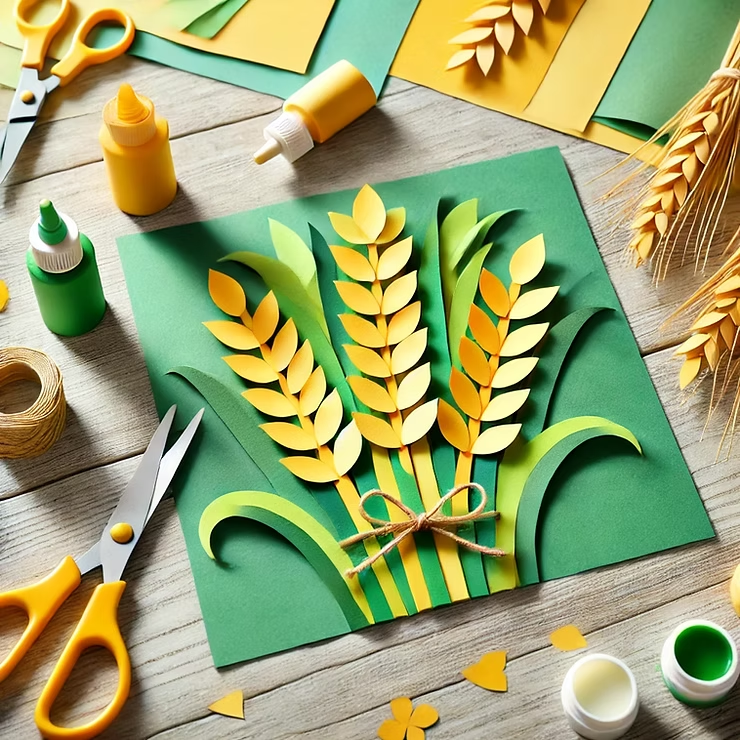
2. Sheaves of Wheat Craft
Craft a field of wheat inspired by Yosef’s dream.
What You’ll Need:
Yellow and green construction paper
Scissors
String or yarn
Glue
How to Make It:
Cut out long yellow strips for wheat stalks and green strips for leaves.
Bundle the stalks together and tie them with yarn or string.
Glue the wheat bundles onto a background to create a field of dreams.
Why I Like It: It’s an easy craft that helps kids connect with Yosef’s dream in a hands-on way.
3. Starry Sky Garland
Create a starry night to represent Yosef’s dream.
What You’ll Need:
Black or dark blue paper
Glow-in-the-dark star stickers
String or ribbon
How to Make It:
Cut out star shapes or use glow-in-the-dark stickers.
Attach them to a piece of string or ribbon.
Bonus idea: Hang the garland in your home for a fun touch.
Why I Like It: It’s decorative and brings Yosef’s dream of the stars to life in a simple way.
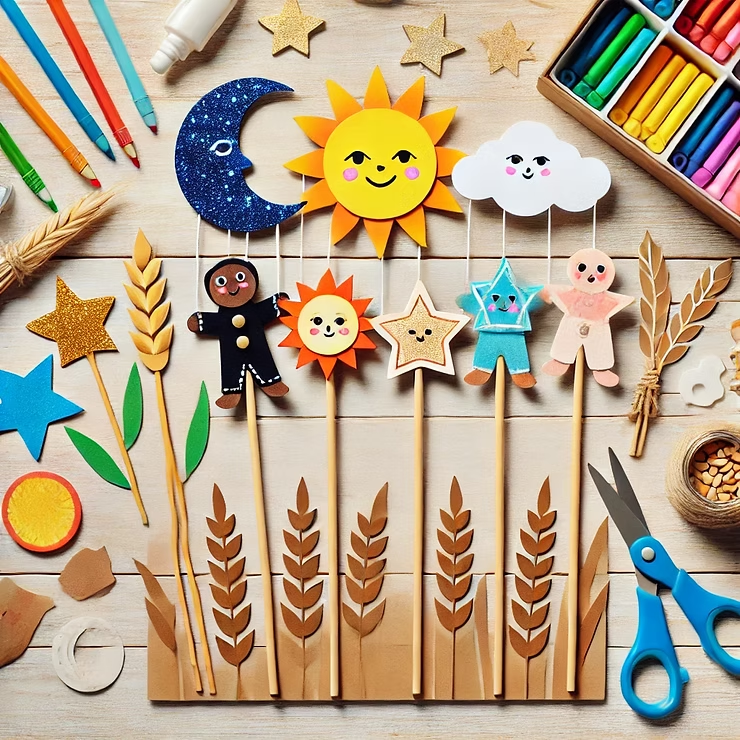
4. Yosef’s Dreams Puppet Show
Act out the parsha with homemade puppets.
What You’ll Need:
Popsicle sticks
Cardstock or felt
Markers
Glue
How to Make It:
Create puppets of Yosef, his brothers, and the symbols from his dreams.
Attach them to popsicle sticks.
Use the puppets to act out scenes from Parshas Vayeshev.
Why I Like It: This interactive craft encourages storytelling and creativity.
Conclusion
Parshas Vayeshev is full of colorful imagery and rich symbolism, making it a wonderful opportunity for hands-on crafts. These creative Parshas Vayeshev crafts not only connect kids to the stories of the Torah but also encourage creativity and engagement.
Which craft will you try this week? Share your creations in the comments—we’d love to see them!
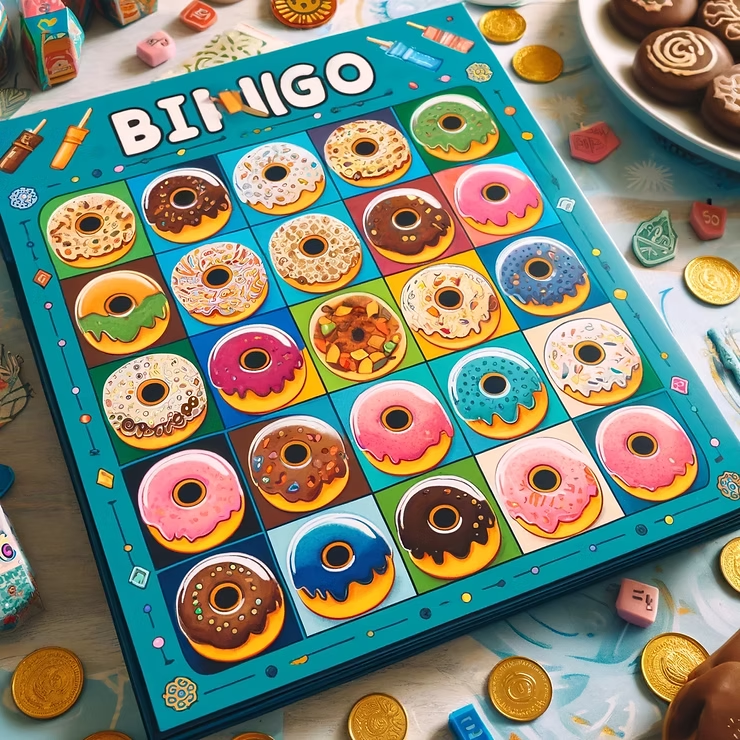
Chanukkah is a time for family, light, and joy. Kids especially love the excitement that comes with the eight nights of celebration. Adding creative and engaging activities to your holiday routine can make it even more memorable. These simple ideas are perfect for bringing the spirit of Chanukkah into your home while keeping kids entertained and inspired.
Why I Like It: It’s quick to set up and keeps kids entertained for hours.
7. Light the Night Scavenger Hunt
Add some adventure to your celebration with a scavenger hunt.
What You’ll Need:
Clues
Chanukkah-themed items like dreidels, gelt, or small gifts
How to Do It:
Write clues leading to hidden items around the house.
Let kids solve the clues to find the treasures.
Why I Like It: It turns each night into an exciting and memorable adventure.
8. Make a Chanukkah Garland
Let kids decorate the house with their own handmade garlands.
What You’ll Need:
Paper, felt, or foam
String or twine
Glue and scissors
How to Do It:
Cut out shapes like dreidels, candles, and stars.
String them together to create a festive garland.
Why I Like It: It brightens up the home with the kids’ creative touch.
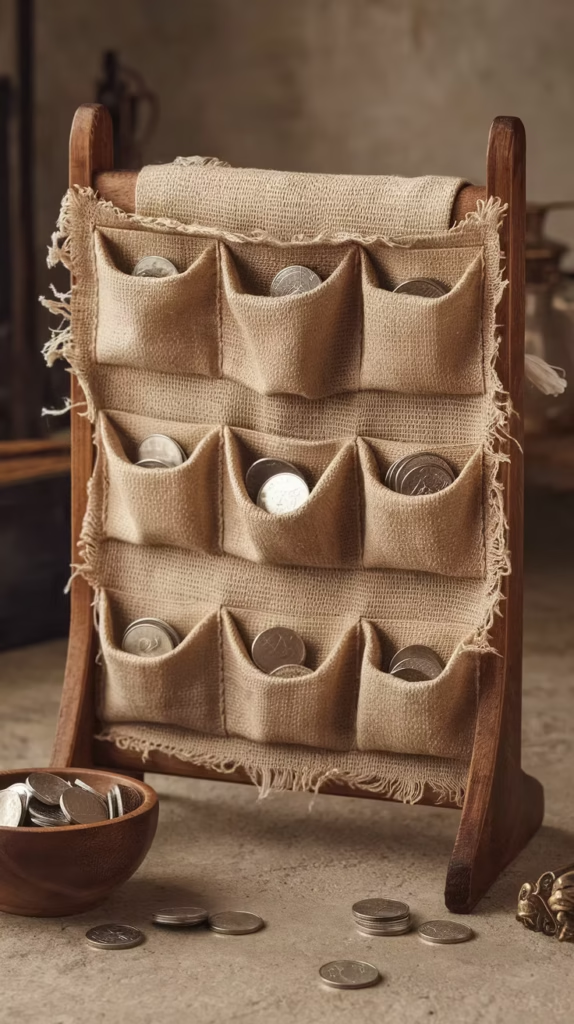
9. Gelt Toss Game
A simple game with a sweet reward.
What You’ll Need:
Clues
Chanukkah-themed items like dreidels, gelt, or small gifts
How to Do It:
Write clues leading to hidden items around the house.
Let kids solve the clues to find the treasures.
Why I Like It: It turns each night into an exciting and memorable adventure.
8. Make a Chanukkah Garland
Let kids decorate the house with their own handmade garlands.
What You’ll Need:
Paper, felt, or foam
String or twine
Glue and scissors
How to Do It:
Cut out shapes like dreidels, candles, and stars.
String them together to create a festive garland.
Why I Like It: It brightens up the home with the kids’ creative touch.
9. Gelt Toss Game
A simple game with a sweet reward.
What You’ll Need:
Chocolate gelt
Bowls or containers
How to Do It:
Set up bowls or boxes at different distances.
Let kids toss gelt into the targets and award points for accuracy.
Why I Like It: It’s an easy activity that everyone can enjoy together.
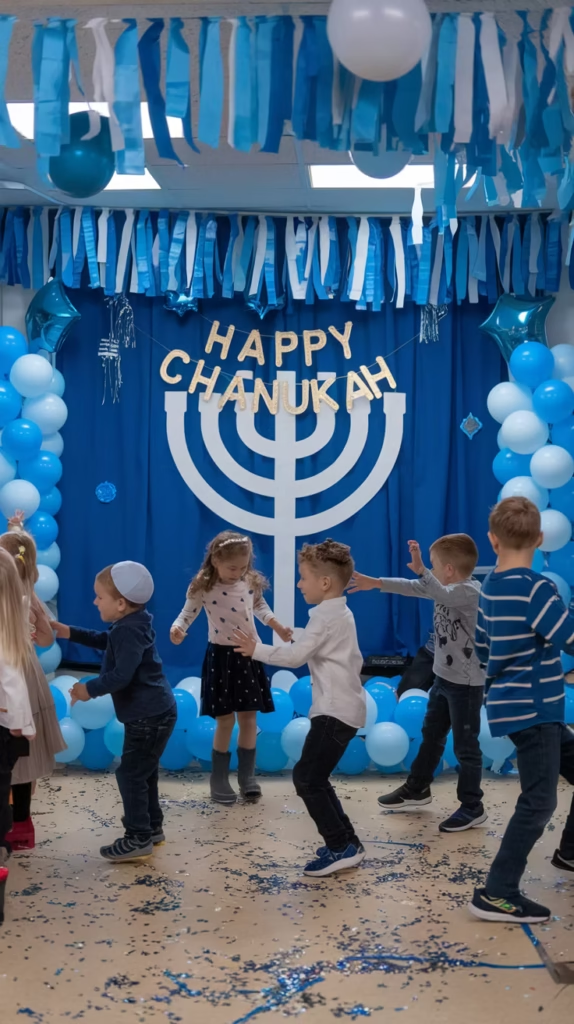
10. Chanukkah Music and Dance Party
Bring energy and joy to your celebration with music and dancing.
What You’ll Need:
Clues
Chanukkah-themed items like dreidels, gelt, or small gifts
How to Do It:
Write clues leading to hidden items around the house.
Let kids solve the clues to find the treasures.
Why I Like It: It turns each night into an exciting and memorable adventure.
8. Make a Chanukkah Garland
Let kids decorate the house with their own handmade garlands.
What You’ll Need:
Paper, felt, or foam
String or twine
Glue and scissors
How to Do It:
Cut out shapes like dreidels, candles, and stars.
String them together to create a festive garland.
Why I Like It: It brightens up the home with the kids’ creative touch.
9. Gelt Toss Game
A simple game with a sweet reward.
What You’ll Need:
Chocolate gelt
Bowls or containers
How to Do It:
Set up bowls or boxes at different distances.
Let kids toss gelt into the targets and award points for accuracy.
Why I Like It: It’s an easy activity that everyone can enjoy together.
10. Chanukkah Music and Dance Party
Bring energy and joy to your celebration with music and dancing.
What You’ll Need:
A Chanukkah playlist
DIY instruments like tambourines or shakers
How to Do It:
Play upbeat Chanukkah songs.
Let kids create their own instruments and dance along.
Why I Like It: Music adds energy and joy, making the celebration even more fun.
Conclusion
Chanukkah is the perfect time to combine tradition with creativity and fun. These fun Chanukkah activities for kids are easy to set up, engaging, and guaranteed to make your celebration special. Whether it’s decorating dreidels, baking festive snacks, or hosting a dance party, these ideas are sure to bring smiles and lasting memories.
Which activity will you try first? Let us know in the comments below!
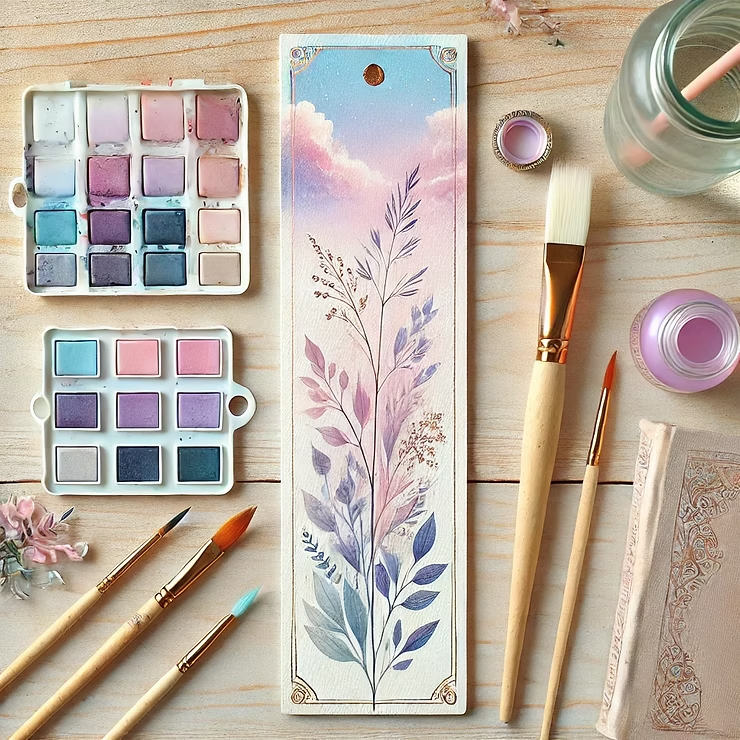
Before sealing, ensure the bookmark is completely dry. Watercolors can take several hours to dry fully, especially if you’ve used thick paint or layers.
2. Choose Your Sealant
Decide on the type of finish you prefer:
Matte Finish: For a natural, subtle look.
Glossy Finish: For a shiny, vibrant effect.
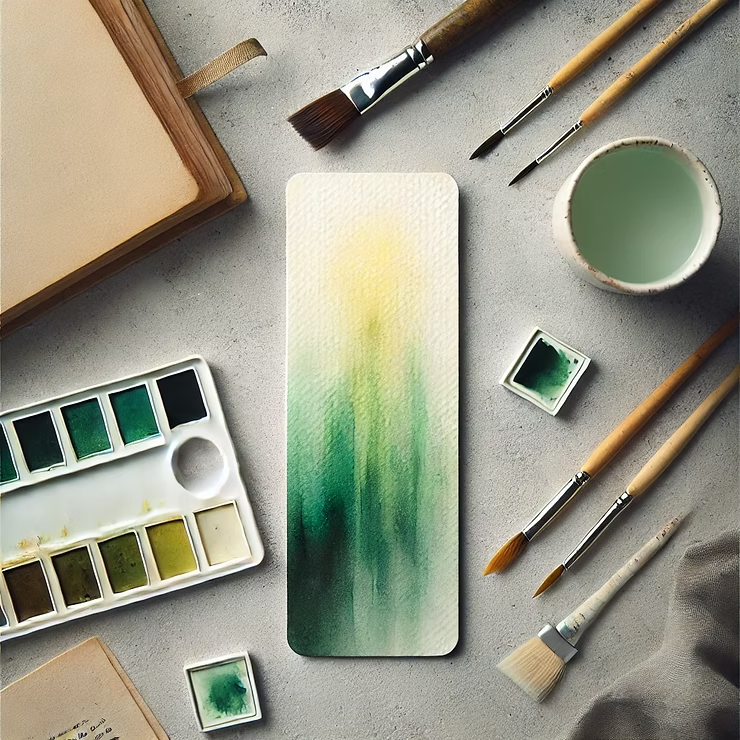
3. Apply a Clear Acrylic Spray Sealant
Place the bookmark on a clean, flat surface in a well-ventilated area.
Shake the spray can according to the instructions.
Hold the spray 10–12 inches away and apply a light, even coat.
Let it dry for 15–30 minutes, then apply a second coat for extra protection.
Pro Tip: Always test the spray on a scrap piece of watercolor paper first to ensure it doesn’t alter the colors.
4. (Optional) Laminate the Bookmark
For maximum durability, consider laminating:
Use a laminator or self-adhesive laminating sheets to encase the bookmark.
Trim the edges for a clean, polished look.
5. Let It Cure
Even after drying, allow the sealed bookmark to cure for 24 hours before heavy use. This ensures the sealant fully sets and protects the artwork.
Tips for Best Results
Avoid Over-Saturating: Apply sealant in light coats to prevent warping or bleeding of the watercolor.
Use Archival Products: Ensure your sealant is acid-free and archival to preserve the artwork long-term.
Handle with Care: Always wash your hands before handling the bookmark to avoid transferring oils or dirt onto the paint.
FAQ: Sealing Watercolor Bookmarks
Q: Can I use Mod Podge to seal my watercolor bookmark?
A: Yes, Mod Podge works well for sealing watercolors. Use a soft brush to apply thin, even coats and let each layer dry before adding another.
Q: Will sealing change the colors of my watercolor?
A: A clear acrylic spray usually doesn’t alter the colors significantly. Glossy finishes may slightly deepen the hues, while matte finishes keep the original look.
Q: Do I need to laminate after sealing?
A: Laminating is optional but adds extra durability, especially if the bookmark will be handled frequently.
Final Thoughts
Sealing your watercolor bookmark is a simple yet essential step to preserve its beauty and ensure it stands up to daily use. With the right materials and techniques, your bookmarks can be both functional and long-lasting. So, gather your supplies, and start protecting your artwork today!
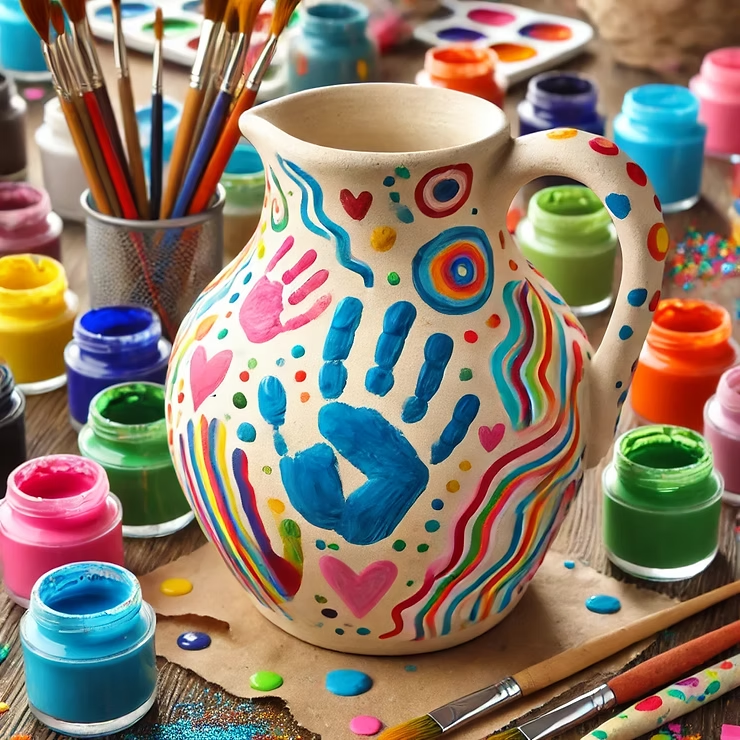
Engaging kids in learning about Parshas Vayishlach can be a really meaningful experience. Crafts are a fun and interactive way to make the weekly Torah portion come alive for children. In this blog, we’ll explore easy and creative Parshas Vayishlach craft ideas that you can make at home or in school. Whether you’re a parent, teacher, or caregiver, these crafts will inspire creativity and learning.
Instructions: Create mini “jugs” inspired by Yaakov’s return for the small vessels. Kids can paint and decorate these using their own creativity.
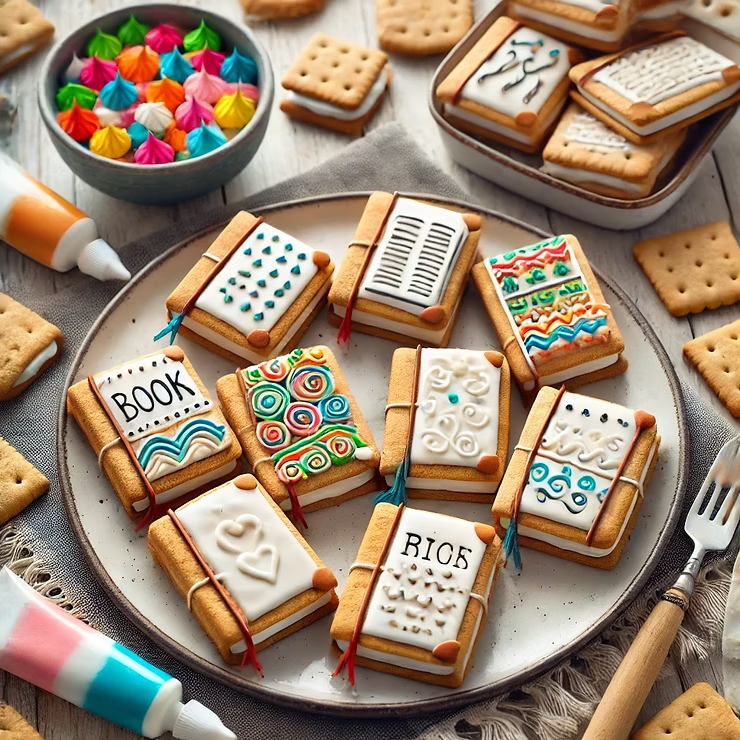
2. Edible Craft: Mini Siddur Treats
What You’ll Need:
Graham crackers or cookies
Frosting or icing
Edible markers
Instructions:Turn graham crackers into “mini siddurs” by decorating them with Hebrew letters and symbols. These adorable treats are perfect for a Shabbat snack.
In Conclusion:
Parshas Vayishlach is full of meaningful lessons, and crafts provide a creative way for children to connect with these stories.
Looking for more craft ideas for Torah portions? Sign up for our newsletter to get fresh, creative projects delivered straight to your inbox!
*This post contains affiliate links, which means I may earn a small commission at no additional cost to you if you click through and make a purchase. As an affiliate, I only recommend products I trust and believe in. Thank you for supporting my work!