Parshas Vayeitzei is filled with incredible stories and themes that lend themselves beautifully to creative and meaningful desserts. If you’re looking for easy, creative Parshas Vayeitzei dessert ideas to serve at your Shabbos table, these sweet options are sure to delight your family and spark meaningful conversations.
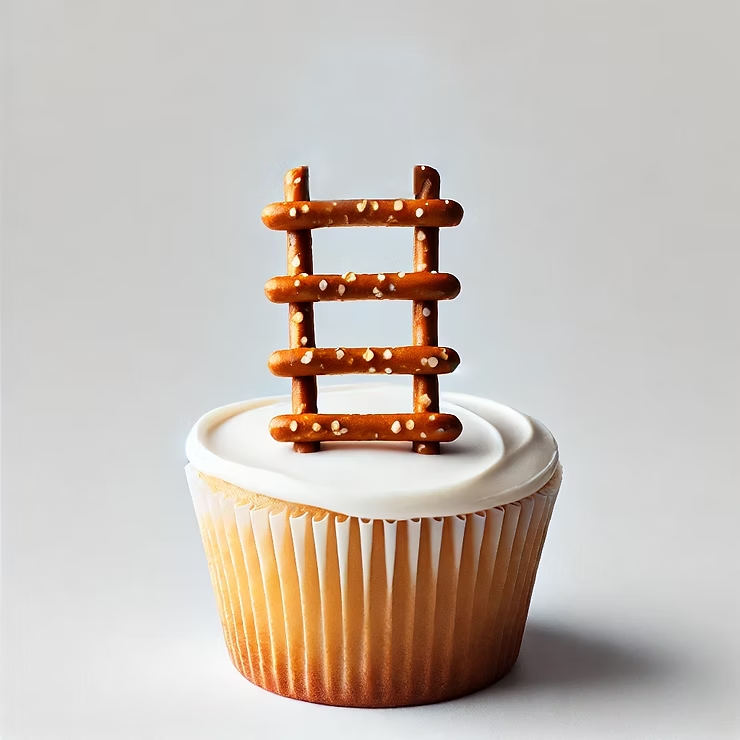
1. Yaakov’s Ladder Cupcakes
These adorable cupcakes represent Yaakov’s dream of the ladder reaching the heavens, with angels going up and down.
What You’ll Need:
Cupcakes (homemade or store-bought)
Pretzel sticks
Mini marshmallows
How to Make It:
Stick two pretzel sticks upright into each cupcake to form the ladder’s sides.
Add smaller pretzel pieces between the sides to make the rungs.
Top with mini marshmallows to represent angels.
Why It’s Perfect: These cupcakes are simple to make, and kids will love creating their own edible ladders.
2. Angel Wing Meringues
These light and airy meringues are a nod to the angels in Yaakov’s dream.
What You’ll Need:
Egg whites
Sugar
Food coloring (optional)
How to Make It:
Whip egg whites and sugar into stiff peaks to create your meringue.
Pipe the meringue into angel wing shapes or simple dollops.
Bake at a low temperature until crisp.
Why It’s Perfect: These meringues are elegant, easy to prepare, and make a great conversation starter.
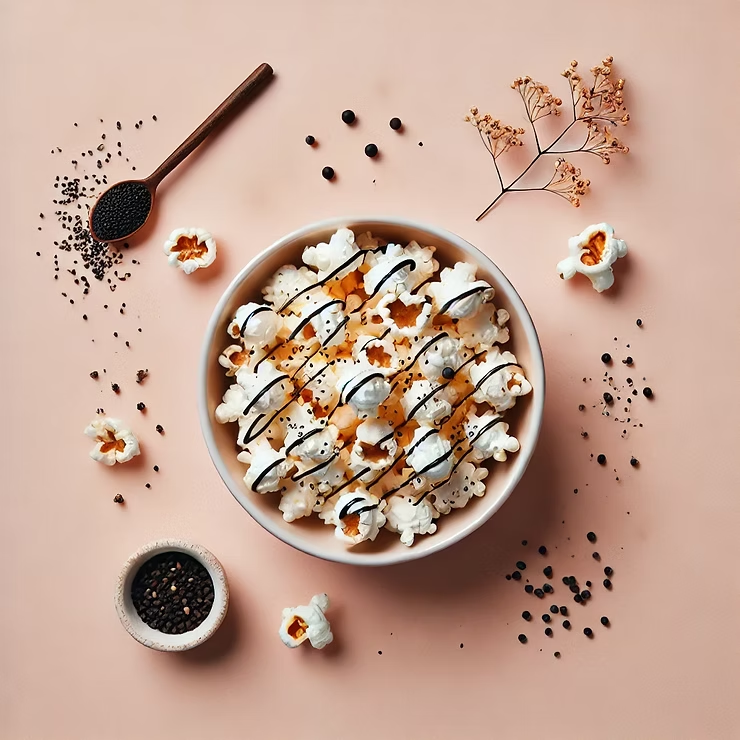
3. Speckled Sheep Popcorn
A playful and easy snack inspired by Lavan’s speckled and spotted sheep.
What You’ll Need:
Popcorn
White chocolate
Black and colored sprinkles
How to Make It:
Pop your popcorn and spread it on a baking sheet.
Drizzle melted white chocolate over the popcorn.
Sprinkle with black and colorful sprinkles to resemble speckled sheep.
Why It’s Perfect: It’s quick, fun, and perfect for kids who love a sweet and salty treat.
Final Thoughts
These creative Parshas Vayeitzei dessert ideas are not only fun and delicious but also a wonderful way to connect the weekly parsha to your family’s Shabbos experience. These treats are sure to make Parshas Vayeitzei even more memorable.
Which dessert are you most excited to try? Let me know how they turn out at your Shabbat table!
Chanukah is a magical time filled with light, joy, and delicious food! While latkes and sufganiyot are staples, adding kid-friendly Chanukah desserts can make your celebrations even more special. These treats are perfect for little hands to help prepare. Let’s dive into some creative and fun Chanukah desserts that your kids will love.
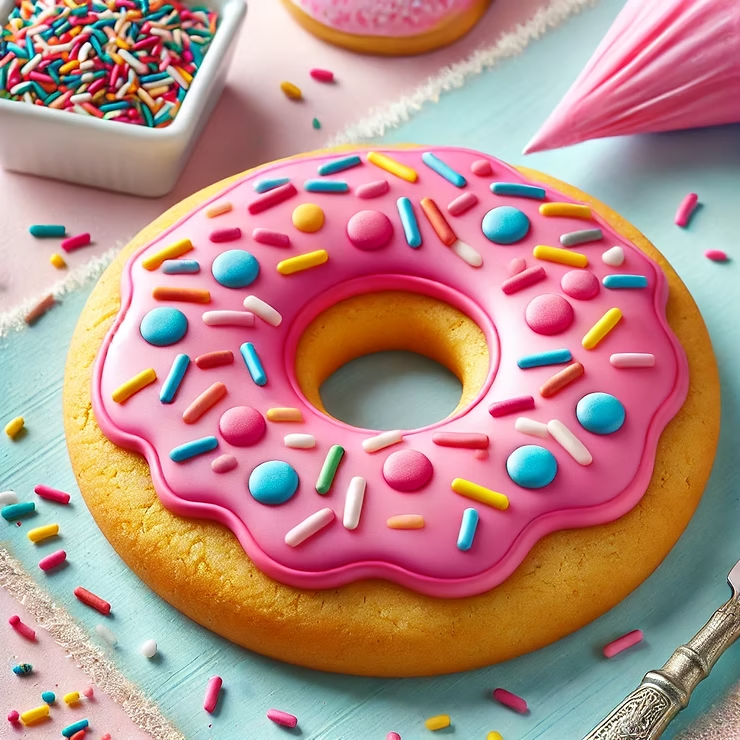
1. Donut Sugar Cookies
Make simple circular sugar cookies. Decorate with icing and sprinkles to give them a festive touch. Let the kids use piping bags to add their own designs!
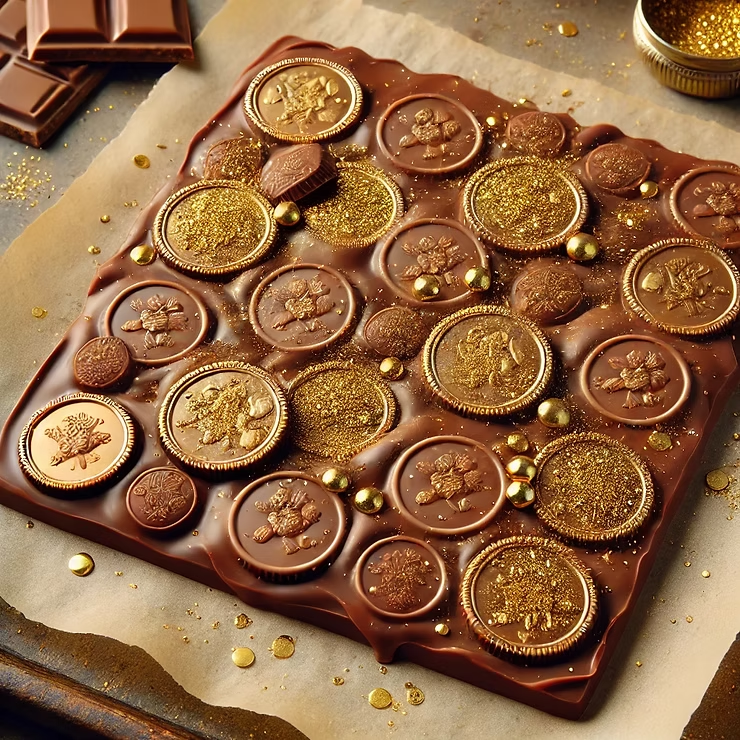
2. Chocolate Gelt Bark
Layer dark and white chocolate on a baking sheet and top with big chocolate coins and edible glitter. Add mini chocolate gelt coins on top for a Chanukah twist.
Kid Activity: Let them sprinkle the toppings!
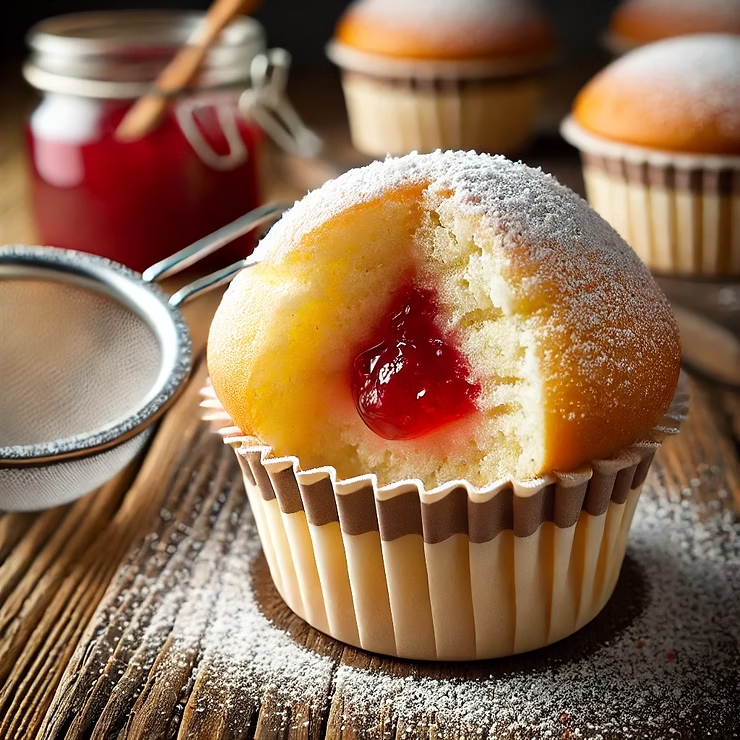
3. Sufganiyot Cupcakes
Combine the classic jelly donut with a cupcake! Pipe jelly into the center of vanilla cupcakes and dust with powdered sugar.
Why Kids Love It: It’s a fun twist on a traditional treat, and they can help fill the cupcakes.
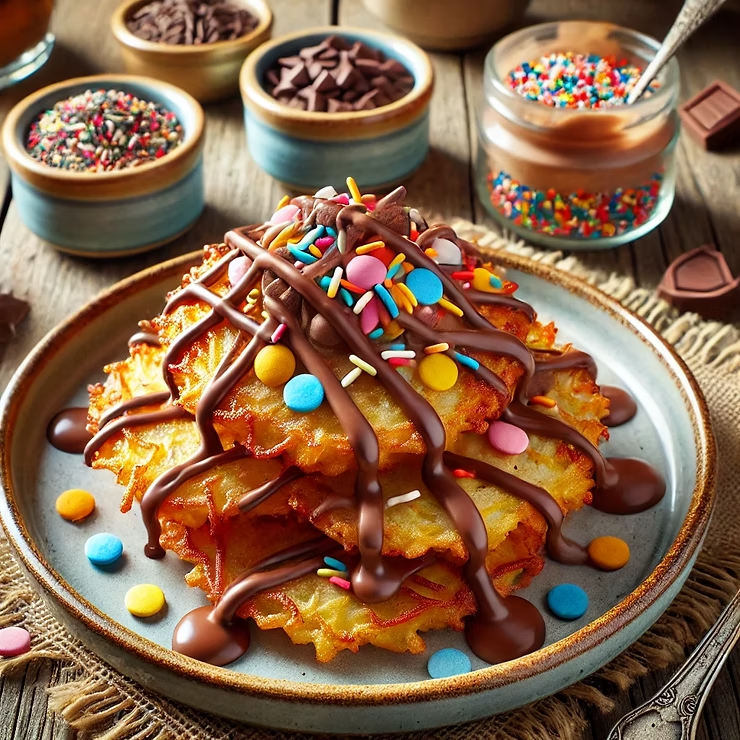
4. Latke-Inspired Dessert Bites
Transform potato latkes into a dessert by adding sweet toppings like cinnamon sugar, apple compote, or chocolate drizzle.
Kid-Friendly Version: Skip frying and bake the latkes for a safer activity.
Conclusion:
Chanukah desserts for kids don’t just bring sweetness to your celebrations—they create memories! These recipes are easy to make and filled with opportunities for your little ones to get involved. Whether you’re hosting a Chanukah party or just enjoying a quiet night at home, these treats will surely bring smiles all around.
Parshas Toldos is a Torah portion rich with stories about family, sibling dynamics, and pivotal moments that shape the Jewish legacy. There are so many opportunities to bring these stories to life in a creative way. What better way to engage your family with the parsha than through delicious, themed desserts? These sweet treats are not only tasty but also serve as meaningful conversation starters at your Shabbat table.
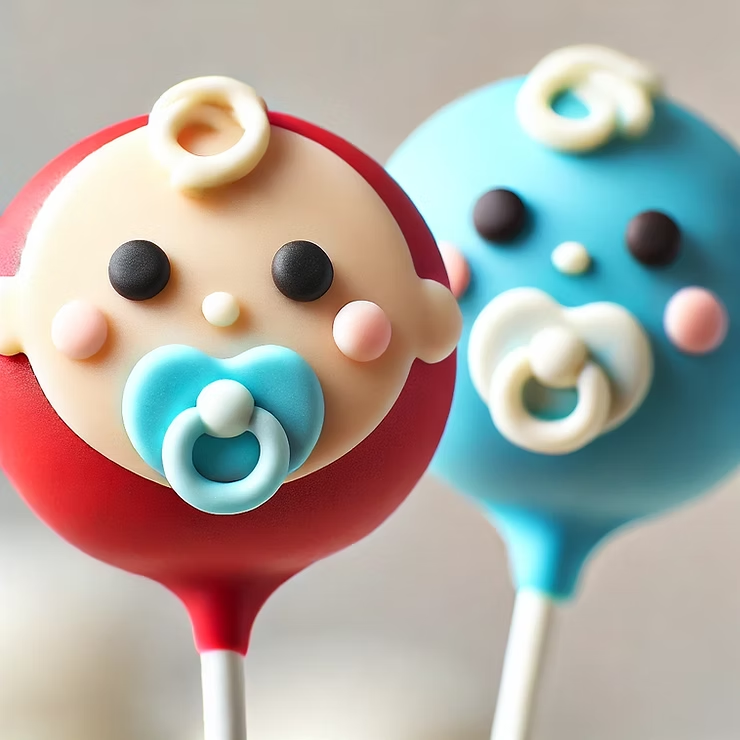
Baby-Themed Cake Pops Recipe
Inspiration: Parshas Toldos begins with the birth of Yaakov and Esav. Make these twin inspired cake pops to engage your family in some parsha conversations.
Ingredients:
1 box of cake mix (any flavor) or pre-baked cake
1 container of frosting (vanilla or cream cheese works well)
Red candy melts
Blue candy melts
Edible food markers or black icing for baby faces
White fondant (optional for pacifiers or bows)
Cake pop sticks
Sprinkles or small candy for decorations (optional)
Styrofoam block or cake pop stand (to hold cake pops upright while drying)
Instructions:
Bake the Cake:Prepare the cake mix according to the package instructions. Allow it to cool completely.
Crumble the Cake:Break the cake into fine crumbs in a large bowl.
Combine with Frosting:Add 2-3 tablespoons of frosting to the crumbs and mix thoroughly until the mixture holds together like dough. Add more frosting if necessary.
Form Cake Balls:Roll small portions of the mixture into evenly sized balls, about 1.5 inches in diameter. Place them on a baking sheet lined with parchment paper. Chill in the refrigerator for at least 1 hour or in the freezer for 15-20 minutes.
Melt Candy Coating:In separate microwave-safe bowls, melt the red and blue candy melts according to the package instructions. Stir until smooth.
Attach the Sticks:Dip one end of a cake pop stick into the melted candy (red for one, blue for the other), then insert it halfway into a chilled cake ball. Let this set for a minute to secure the stick.
Coat the Cake Pops:Dip one cake pop into the red candy melt and the other into the blue. Gently tap off excess coating. Place the pops upright in a styrofoam block or cake pop stand to set.
Decorate the Faces:Once the coating is set, use edible food markers or black icing to draw simple baby faces, including eyes, a smile, or a pacifier.
Optional: Use small pieces of fondant to create tiny pacifiers or bows, attaching them with a small dab of melted candy.
Add Extra Decorations:You can add sprinkles or small candies as additional decorations for extra flair.
Let Set and Serve:Allow all decorations to set completely. Your adorable baby-themed cake pops are ready to be displayed and enjoyed!
Conclusion:
These desserts aren’t just fun and delicious—they’re also a meaningful way to connect your family to the weekly Torah portion. As you enjoy these treats, use them as a springboard for discussing the lessons of Parshas Toldos, like the importance of sibling relationships, making thoughtful choices, and the significance of blessings.
With these sweet creations on your Shabbat table, Parshas Toldos will surely be one to remember!
Parshas Chayei Sarah is filled with meaningful stories and themes, making it a wonderful inspiration for hands-on crafts that bring the parsha to life for kids. This week, we’re exploring two fun and educational crafts: camel puppets to represent Eliezer’s journey and a beaded jewelry activity inspired by Rivka’s kindness. These crafts are perfect for engaging children in the story while reinforcing important values like chesed (kindness) and creativity!
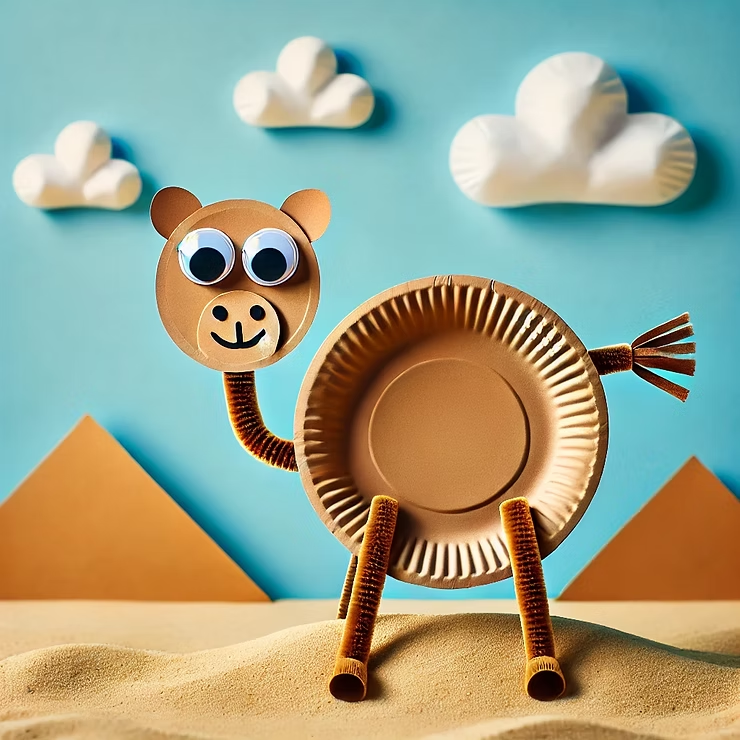
Craft 1: Camel Puppets for Eliezer’s Journey
Camels were an essential part of Eliezer’s journey to find a wife for Yitzchak. This craft allows kids to create their very own camel puppet to retell the story.
Materials Needed:
Paper plates
Brown paint or crayons
Googly eyes
Pipe cleaners (for legs)
Glue
Scissors
Instructions:
Use a paper plate to create the camel’s body.
Paint or color the plate brown and let it dry.
Cut out a small oval from another paper plate to make the camel’s head. Attach it to the folded plate with glue.
Use pipe cleaners to make the camel’s legs and tail. Attach these to the folded edge of the plate.
Add googly eyes and draw a mouth with a marker.
Optional: Attach a popsicle stick to the bottom to turn the camel into a puppet.
Bonus Idea: Create a “desert scene” by drawing a background with sand dunes and palm trees for the camels to travel through.
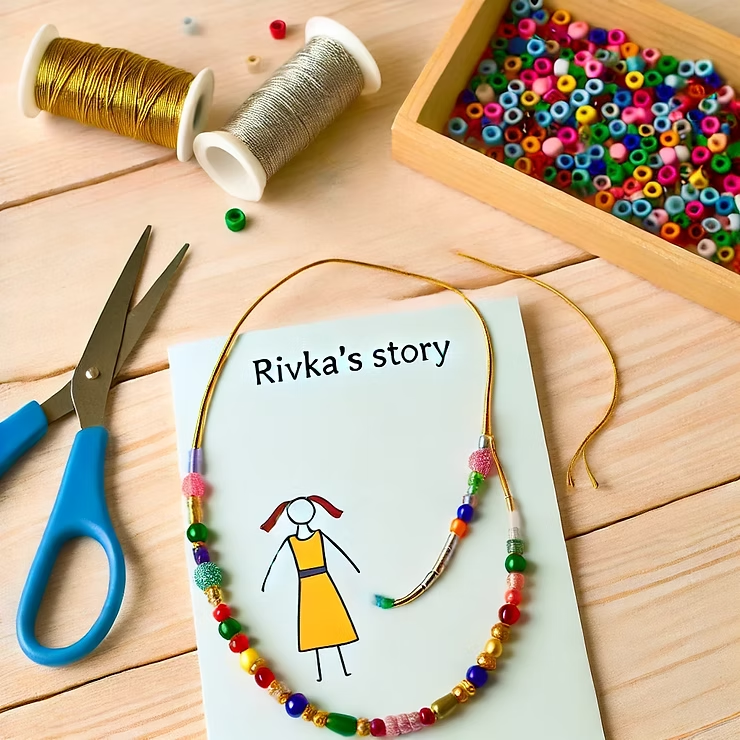
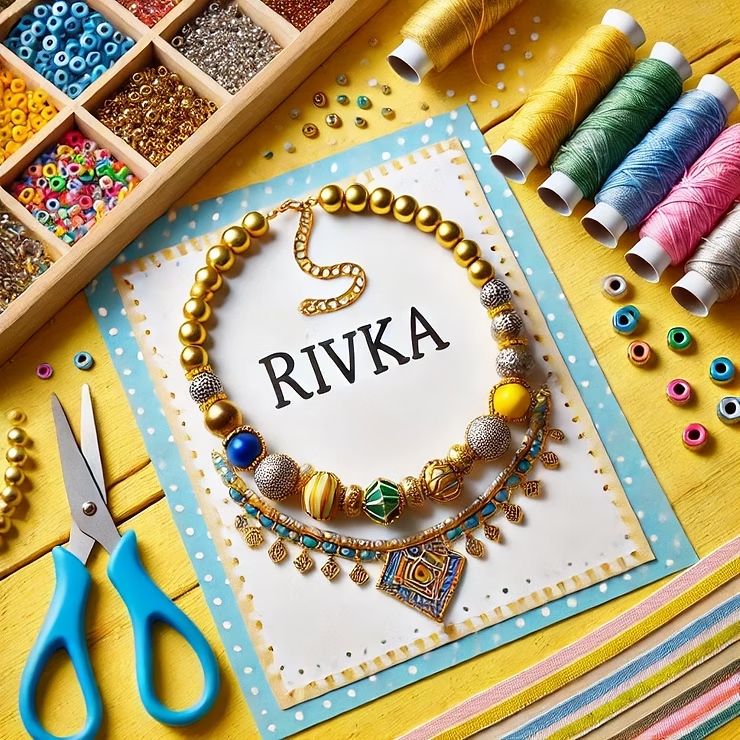
Craft 2: Rivka’s Beaded Necklace
When Eliezer met Rivka, he gifted her beautiful jewelry as a token of appreciation for her kindness. This beading activity lets kids create their own “Rivka-inspired” necklace or bracelet.
Materials Needed:
String or elastic cord
Assorted beads (gold, silver, or colorful to mimic Rivka’s gift)
Scissors
Optional: Charms or letter beads
Instructions:
Cut a length of string or elastic cord long enough for a necklace or bracelet.
Let the children thread beads onto the string in patterns of their choice.
Add a charm or a special bead to symbolize Rivka’s chesed.
Once the beading is complete, tie a secure knot and trim the excess string.
Extension Activity: Discuss Rivka’s act of kindness and ask the kids to share ideas of how they can practice chesed in their own lives.
Conclusion
These crafts are a wonderful way to help children connect with the stories of Parshas Chayei Sarah. By making camels and Rivka-inspired jewelry, kids not only get to express their creativity but also deepen their understanding of the parsha’s lessons. Try these crafts at home or in the classroom and watch the story come alive!
Introducing kids to the Hebrew alphabet can be a memorable experience, especially when you use creative and interactive activities like crafts. The letter Alef, the first letter of the Hebrew alphabet, is a fantastic place to start! These easy and fun letter Alef crafts make learning Alef hands-on and enjoyable, ensuring that kids grasp the shape and sound of Alef in a meaningful way.
In this post, we’ll explore several letter Alef craft ideas that use simple materials and provide a multi-sensory experience perfect for young learners.
Why Crafts Are Great for Learning Alef
Crafts are an ideal way to teach kids the Hebrew alphabet because they bring each letter to life. By molding, coloring, or constructing the letter Alef, children learn not only its shape but also build fine motor skills and tactile memory. Plus, crafting Alef keeps kids engaged, letting them play while they learn.
5 Fun and Engaging Letter Alef Crafts for Kids
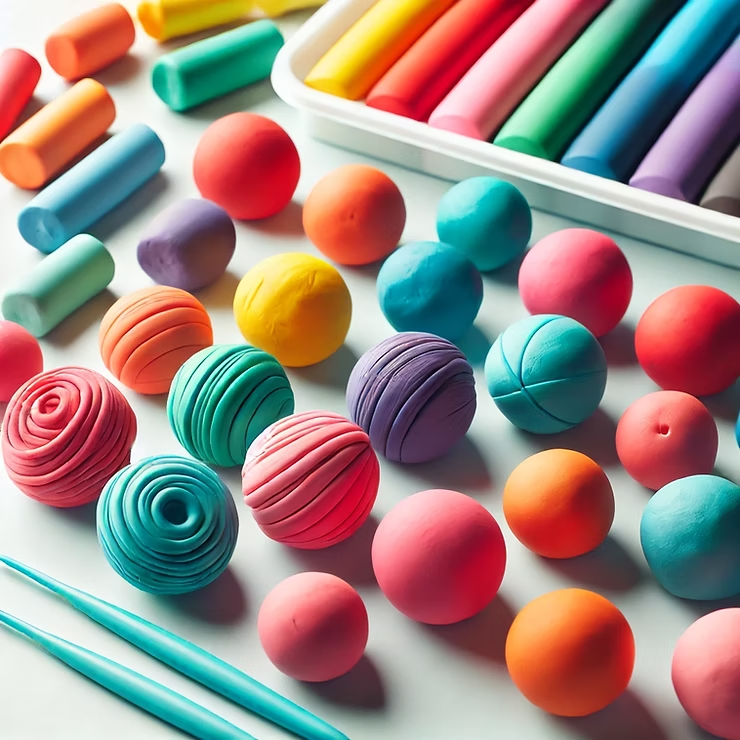
1. Clay Alef Sculptures
Materials Needed:
Different colors of clay or playdough
Letter Alef outline printed on paper
Instructions: Have children mold the letter Alef out of clay or playdough. Encourage them to touch and feel the curves and structure of the letter as they form it, repeating its name as they go. They can make Alef in different colors to practice and get a feel for the shape.
Educational Benefit: This craft helps children with letter recognition and fine motor skills, providing a sensory way to learn the shape of Alef.
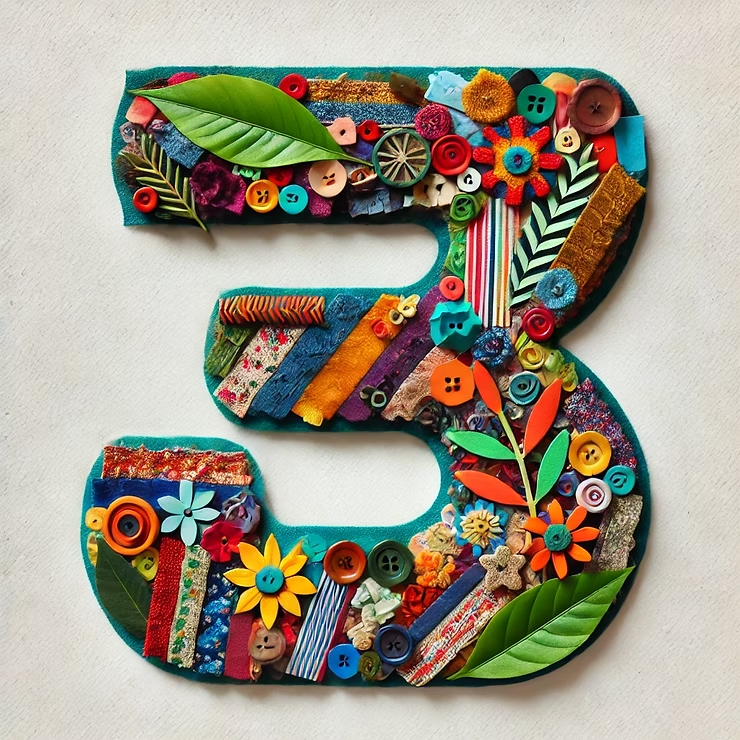
2. Alef Collage Art
Materials Needed:
Fabric scraps, colored paper, leaves, twigs, and glue
A large outline of Alef (drawn or printed)
Instructions: Draw or print a large outline of Alef and have kids fill it with colorful materials like fabric scraps, magazine clippings, or leaves. The result is a textured collage in the shape of Alef that can be displayed on the wall.
Educational Benefit: Alef collage art is a visual and tactile activity that reinforces the letter’s shape, making it easier for kids to remember and recognize Alef in the future.
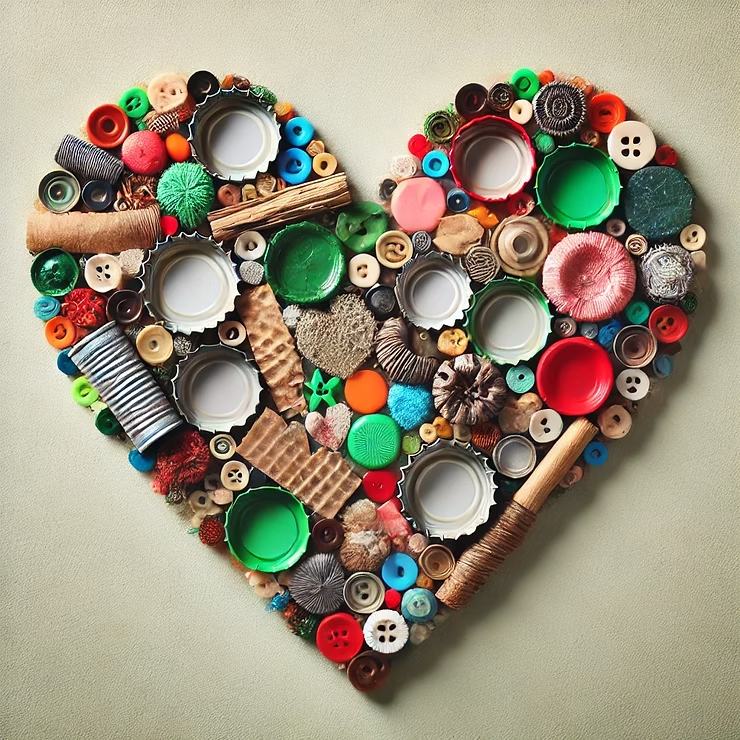
3. Alef with Recycled Materials
Materials Needed:
Bottle caps, cardboard, empty paper rolls, etc.
Glue and scissors
Instructions: Using various recycled materials, guide kids to form the letter Alef by gluing items together in its shape. This activity is excellent for teaching kids about the letter Alef and sustainability.
Educational Benefit: Building Alef with recycled items teaches kids environmental awareness while they learn the letter’s form.
Tips for Parents and Educators
Using these letter Alef crafts regularly can help reinforce early Hebrew learning for kids. Here are some extra tips for using these activities effectively:
Display Their Work: Show off completed Alef crafts at home or in the classroom to remind kids of what they learned.
Repeat Often: Incorporate Alef-themed crafts regularly to keep the learning fresh and memorable.
Connect to Sounds: While crafting, gently introduce the sound of Alef and words that begin with the letter, like “Apple” or “Abba,” to connect the letter with vocabulary.
Conclusion
Starting with the letter Alef is a meaningful way to introduce kids to the Hebrew alphabet. These letter Alef crafts offer a hands-on, fun approach to learning that makes Hebrew feel exciting and approachable. Each activity is designed to be simple, engaging, and effective in teaching Alef’s unique shape and sound.
Try these crafts with your kids and see their excitement grow as they master Alef! Share your creations or let us know which activity was their favorite.
As a busy mom, finding time to prepare dinner can often feel like an impossible task. Between school runs, after-school activities, and everything else on your plate, the last thing you want is to spend hours in the kitchen. But mealtime doesn’t have to be stressful or complicated. With a little planning, you can prepare delicious kosher meals that will please your family and save you time. Here are some quick and easy kosher dinner ideas that are perfect for busy moms!
Quick Kosher Dinner Ideas
When you’re pressed for time, quick meals that don’t sacrifice flavor or nutrition are essential. Kids can help out with these as well. Read about the benefits of allowing children to ‘help’ in the kitchen here.These dinner ideas that can be prepared in 30 minutes or less:
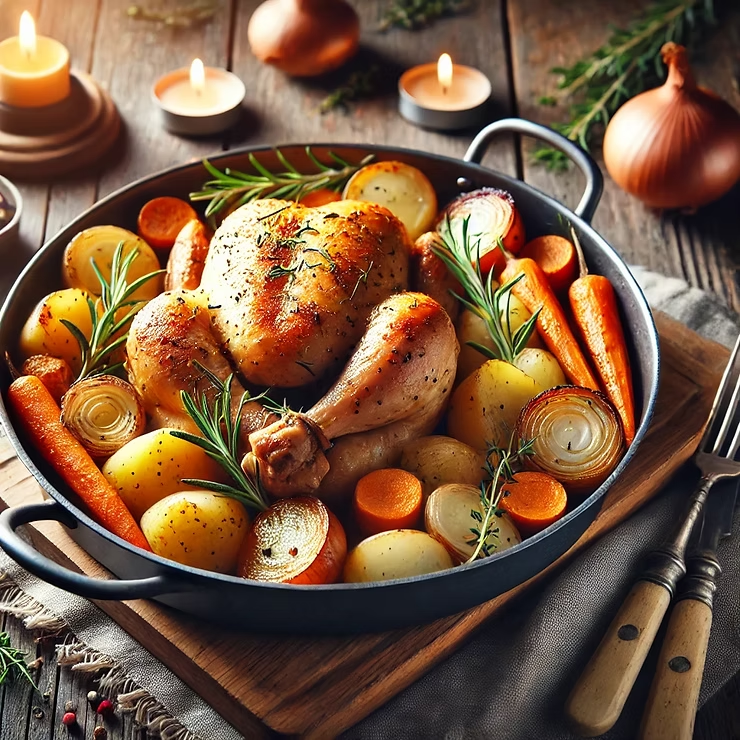
1. One-Pot Chicken
A classic, simple dish that you can make in one pot. Use chicken thighs or drumsticks, along with potatoes and your favorite veggies. Season it with garlic, onion, and a mix of herbs. It’s a no-fuss meal that’s perfect for a busy weeknight.
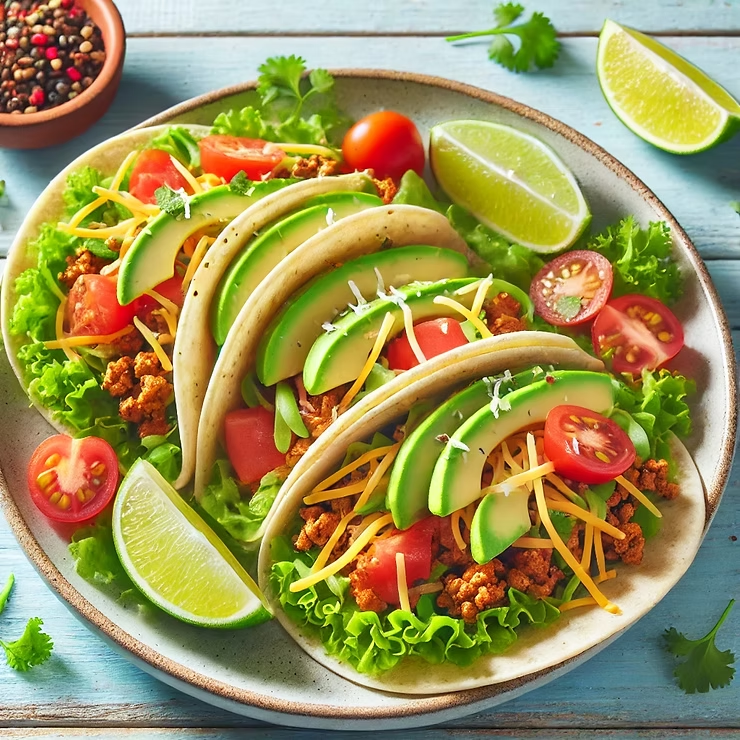
2. Kosher Tacos
Tacos are a great way to get a meal on the table in a flash. Use ground turkey or beef, and top with kosher-friendly ingredients like lettuce, tomatoes, vegan cheese, and avocado. Serve with corn or flour tortillas for a quick and tasty dinner.
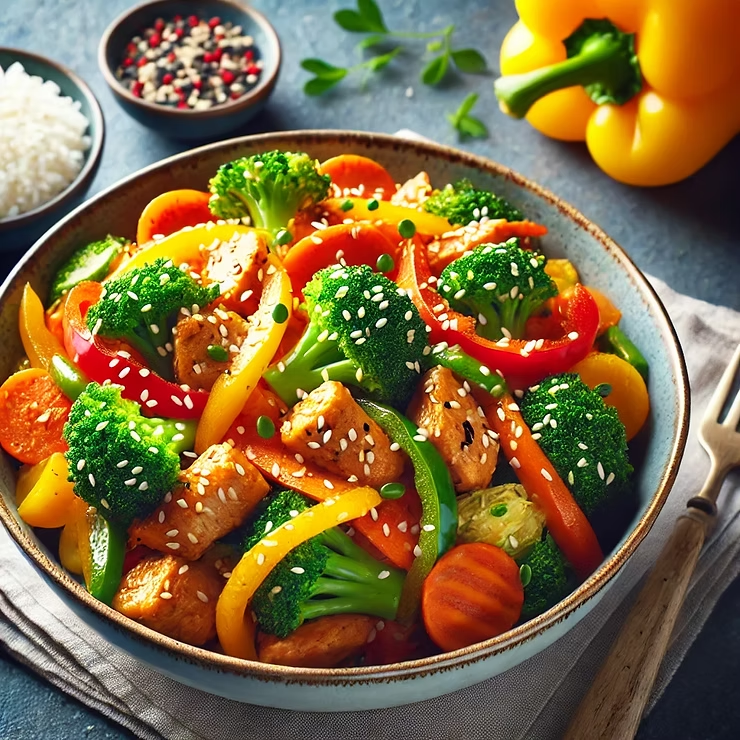
3. Quick Stir-Fry
Stir-fries are one of the fastest meals to prepare. Sauté some pre-chopped vegetables and your choice of protein—chicken, beef, or tofu—in a skillet. Add soy sauce or teriyaki sauce, and serve with rice or noodles for a complete meal.
4. Vegetarian Stuffed Peppers
For a light, healthy meal, stuff bell peppers with a mixture of rice, beans, and kosher cheese. Pop them in the oven for about 20 minutes, and you’ve got a meal that’s both delicious and filling.
Make-Ahead Kosher Meals
When you can prep meals in advance, you make your evenings so much easier. These make-ahead kosher meals are perfect for busy moms who want to save time during the week:
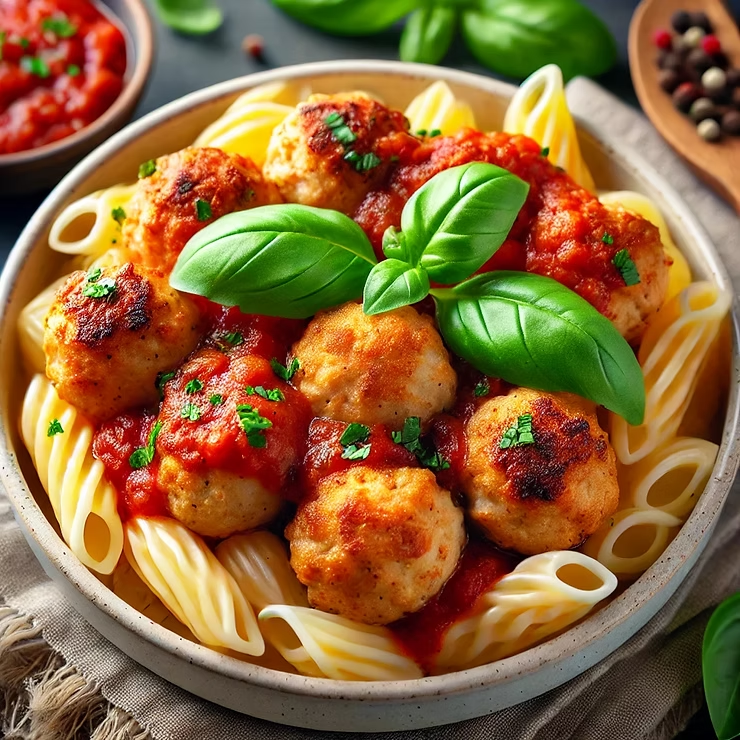
1. Kosher Meatballs
Make a big batch of kosher meatballs at the begining of the week and store them in the freezer. You can easily reheat them and serve with pasta, rice, or in a sub roll with some marinara sauce for a quick, comforting meal.
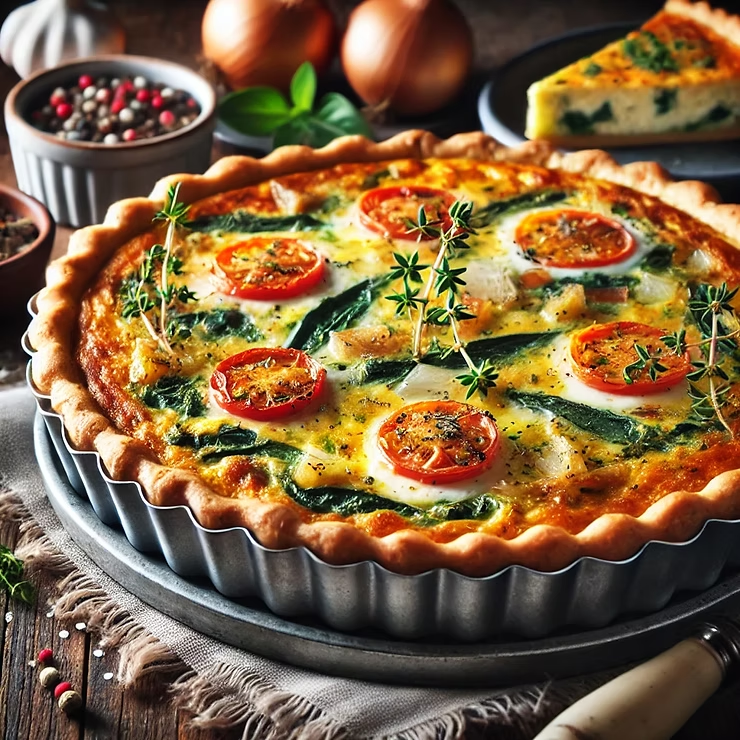
2. Kosher Quiche
Quiche is a versatile dish that can be made ahead and eaten throughout the week. Fill it with veggies, vegan cheese, and a protein of your choice—like kosher turkey or chicken—and bake it. It’s perfect for lunch or dinner and can be served warm or cold.
Kosher Dinner for Kids
Getting kids to eat healthy meals can be a challenge, but these kosher dinner ideas are sure to please even the pickiest eaters:
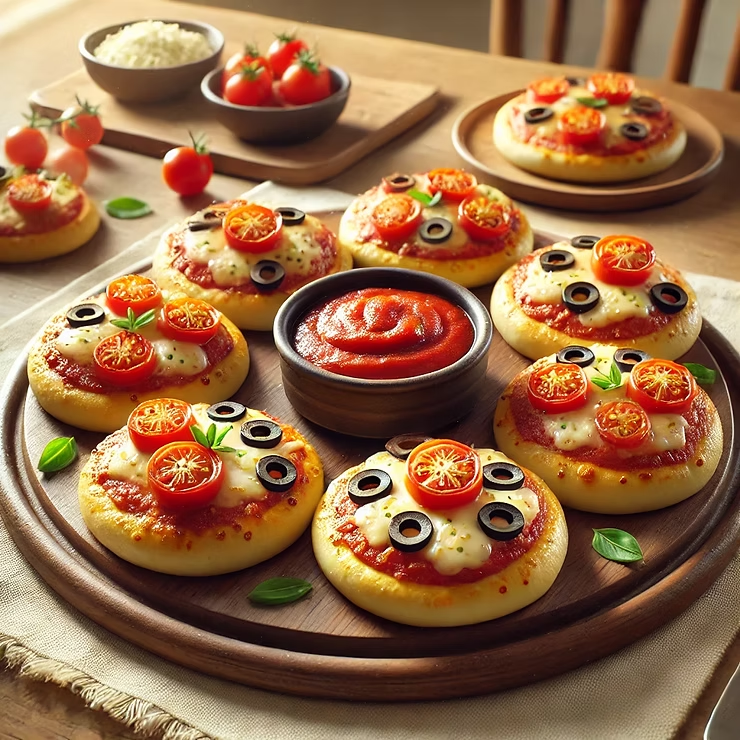
1. Mini Kosher Pizzas
Kids love pizza, and making mini pizzas at home is a fun way to get them involved in the kitchen. Use whole wheat pita bread or flatbreads as the base, and let your kids add their own toppings—olives, tomatoes, or cheese.
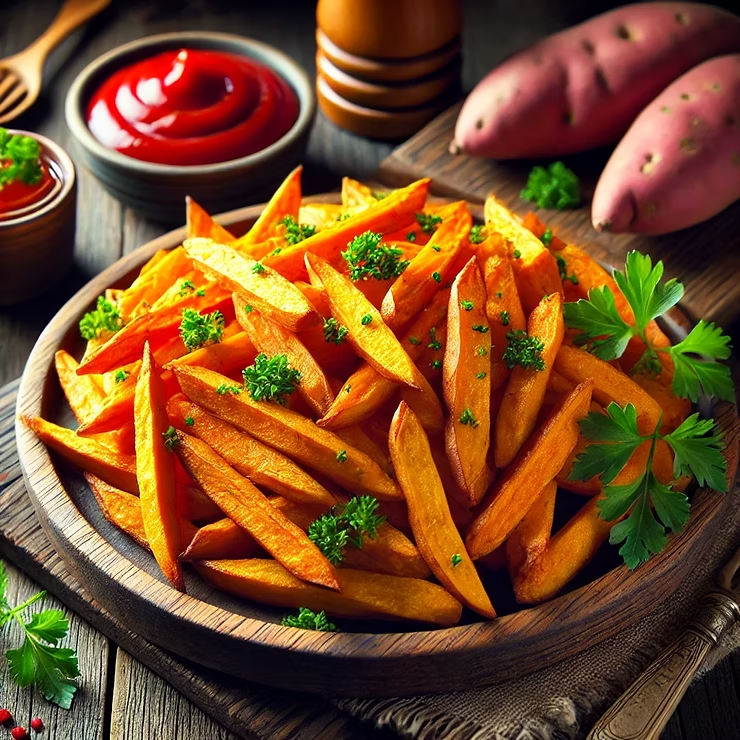
2. Chicken Nuggets with Sweet Potato Fries
Skip the frozen versions and make your own healthier chicken nuggets. Coat pieces of chicken breast in breadcrumbs and bake them until golden and crispy. Pair them with homemade sweet potato fries for a nutritious twist on a classic favorite.
Tips for Streamlining Dinner Prep
Even with these quick and easy kosher dinner ideas, dinner prep can still be time-consuming. Here are some tips to help streamline your cooking routine:
Plan Meals Around Common Ingredients: Choose recipes that use overlapping ingredients, such as chicken, onions, and carrots. This way, you can buy in bulk and use ingredients in multiple meals.
Use a Slow Cooker or Instant Pot: These appliances are lifesavers for busy moms. They allow you to throw in ingredients and come back later to a fully cooked meal.
Prep Vegetables and Proteins in Advance: Chop vegetables and marinate proteins on your day off to make weekday cooking faster and easier. Store everything in airtight containers for the week.
Conclusion
Being a busy mom doesn’t mean you have to compromise on the quality of the meals you serve your family. With a little bit of planning and these kosher dinner ideas, you can create quick, nutritious, and delicious meals that everyone will love. So, the next time you’re feeling rushed, try one of these simple recipes and enjoy a stress-free mealtime!
In today’s world, where sustainability and eco-consciousness are more important than ever, it’s essential to teach kids about the value of recycling and reusing materials. One of the best ways to do this is through crafting! By using everyday household items that would typically end up in the trash, kids can create imaginative, fun, and functional crafts that not only help them develop their creativity but also foster a sense of responsibility toward the environment.
In this blog post, we’ll explore a variety of easy recycled crafts for kids that are both fun and educational. From using toilet paper rolls to old bottle caps, we’ll show you how to repurpose common items into beautiful art projects. These crafts are perfect for rainy days, classroom activities, or simply spending quality time at home.
Let’s dive into some fantastic recycled craft ideas that will make your kids excited about being creative and helping the planet!
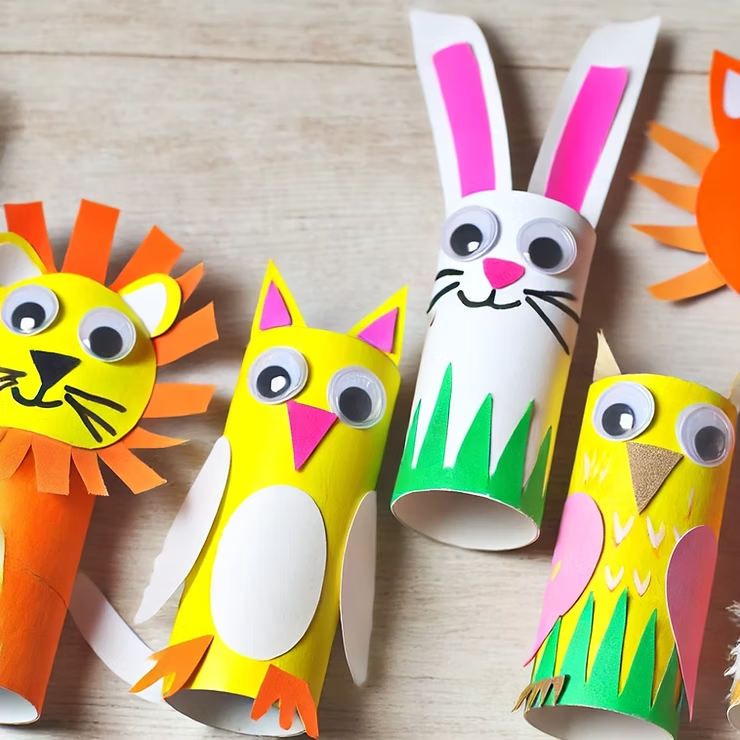
1. Toilet Paper Roll Animals
Materials Needed:
Empty toilet paper rolls
Markers, crayons, or paint
Glue
Googly eyes (optional)
Paper or craft foam for ears, tails, and other features
Instructions:
Begin by cutting the toilet paper roll into smaller sections, approximately 2 to 3 inches each. These will be the bodies of your animals.
Let your child decorate the roll with paints, crayons, or markers. They can choose any animal they want, like a lion, owl, or rabbit.
Once the body is decorated, help your child cut out small pieces of paper or foam to create the animal’s ears, tails, and other features. For example, make triangles for cat ears or round shapes for an owl’s eyes.
Use glue to attach these additional features to the roll. If you have googly eyes, now is the time to add them for extra personality.
Let the creations dry, and then your child will have a collection of adorable toilet paper roll animals!
Why It’s Great: This craft is a perfect way to encourage children to think about animals and nature while teaching them the importance of recycling. Plus, it’s simple to make with minimal materials!
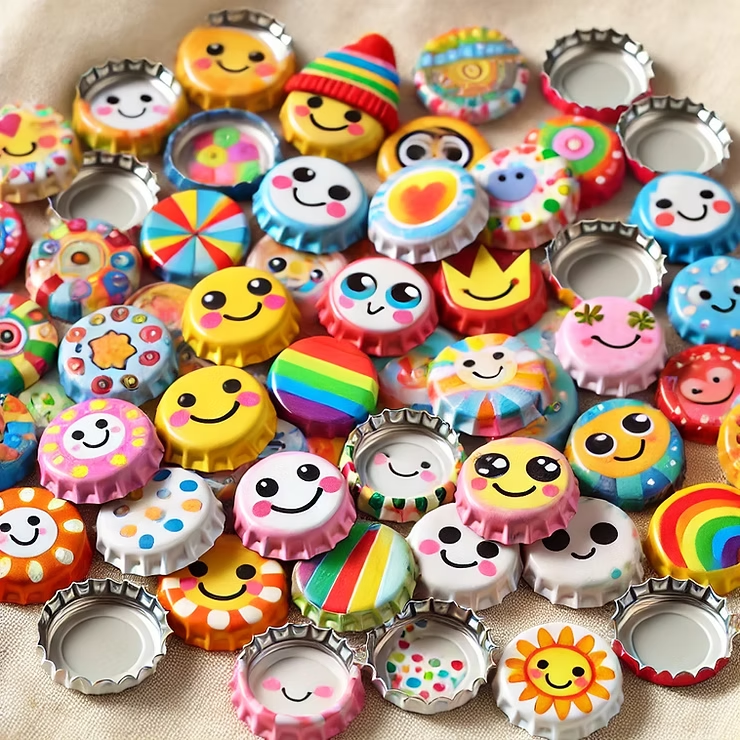
2. Bottle Cap Magnets
Materials Needed:
Old bottle caps (metal or plastic)
Paint, markers, or stickers
Small magnets
Glue
Instructions:
Start by collecting some old bottle caps from soda bottles or jars. Make sure they are clean and dry before using them.
Let your child decorate the bottle caps using paint, markers, or stickers. They can create designs, write their names, or even make faces and animals!
Once the paint or markers are dry, glue a small magnet to the back of each bottle cap.
Once everything is dry, the bottle cap magnets are ready to be displayed on the fridge or any metal surface.
Why It’s Great: Not only does this craft help teach kids about recycling, but it also turns an ordinary item like a bottle cap into something useful and fun. Plus, it’s a great way for kids to showcase their creativity and art skills.
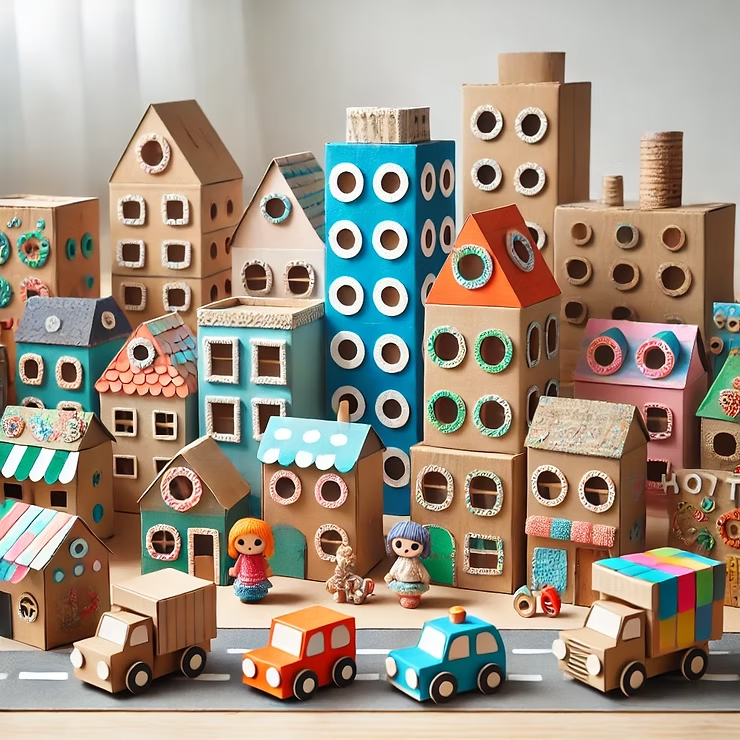
3. Cardboard Box City
Materials Needed:
Empty cereal boxes or small cardboard boxes
Markers, crayons, or paint
Scissors
Glue
Instructions:
Gather a variety of cardboard boxes from your pantry or recycling bin. Small cereal boxes work well, but you can also use shoe boxes or other types of cardboard.
Cut the boxes into different shapes to create buildings, houses, and even skyscrapers.
Have your child decorate the boxes with paint or markers to resemble different types of buildings. They can make houses, shops, or even castles!
Once decorated, help them glue the boxes together to form a mini cityscape. They can arrange the buildings in any way they like to create their own urban world.
Use small toy cars, action figures, or dolls to complete the scene, turning it into a fun play space.
Why It’s Great: This craft allows kids to think outside the box (literally!) and create a detailed world out of recycled materials. It encourages problem-solving, imaginative play, and teamwork if done in a group.
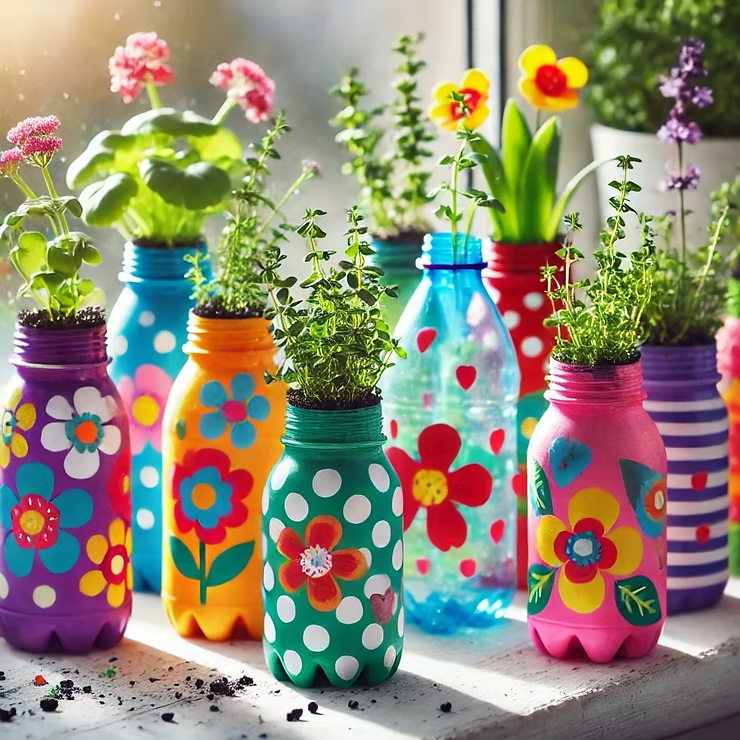
Start by cutting the plastic bottle in half. The bottom half will serve as the planter.
Let your child paint the outside of the bottle with bright colors or fun designs to make it look decorative.
Once dry, fill the bottom half of the bottle with soil.
Help your child plant small plants or seeds in the soil. You can plant flowers, herbs, or even small succulents.
Place the bottle planter on a windowsill, and watch the plants grow!
Why It’s Great: Plastic bottle planters are a wonderful way to teach kids about gardening and sustainability. This craft allows children to connect with nature while recycling at the same time.
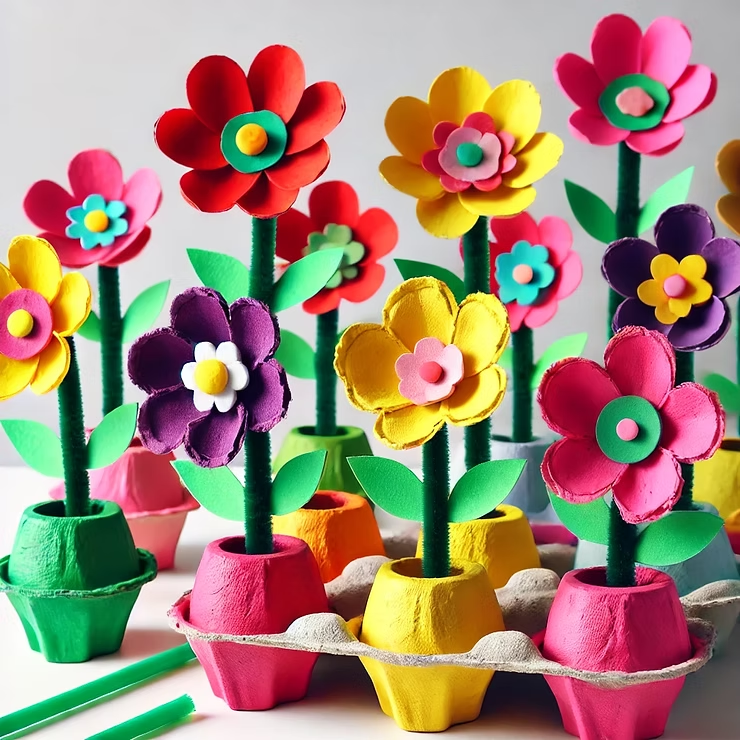
5. Egg Carton Flowers
Materials Needed:
Egg cartons (cardboard ones)
Paint, markers, or crayons
Green pipe cleaners (for stems)
Scissors
Glue
Instructions:
Cut individual cups from the egg carton. These will be the petals of the flower.
Have your child paint or color each cup with bright colors, such as red, pink, or yellow.
Once the flowers are dry, glue a pipe cleaner or straw to the bottom of each flower to create the stem.
You can make a bunch of these flowers and arrange them in a vase, or use them to decorate a room.
Why It’s Great: This is a simple yet charming craft that introduces kids to the concept of recycling materials in an easy and fun way. Plus, it’s a great way for them to work on their fine motor skills as they paint and glue the pieces together.
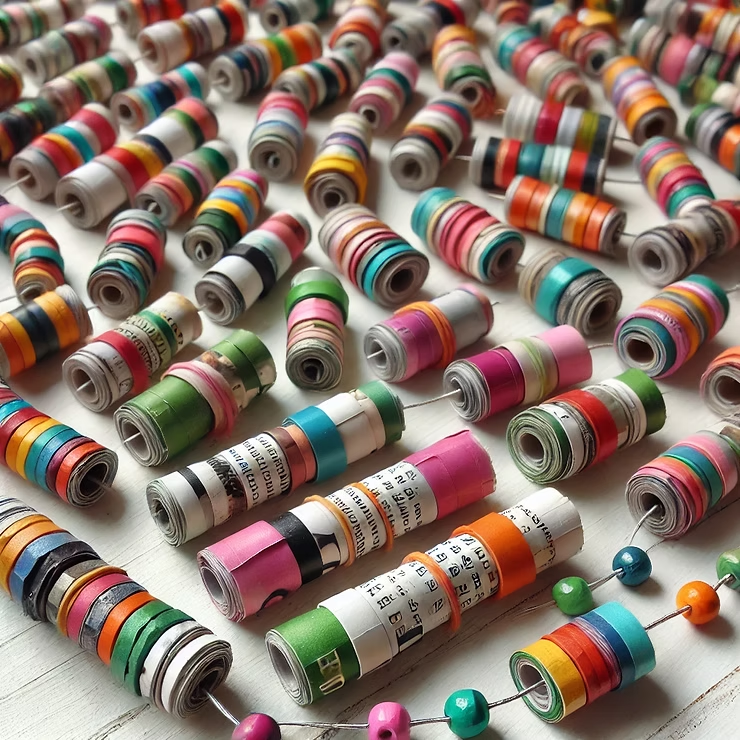
6. Recycled Paper Beads
Materials Needed:
Old magazines or scrap paper
Scissors
Glue
String or thread
Instructions:
Start by cutting the magazines or scrap paper into long, triangle-shaped strips.
Beginning at the wide end of the triangle, help your child roll the paper tightly into a bead.
Use a small dab of glue to secure the paper at the end of the strip.
Once the beads are dry, string them together to create necklaces, bracelets, or even keychains.
Why It’s Great: This craft teaches children the value of reusing old paper, and it also creates something beautiful and wearable. It’s a fun way to incorporate recycling into fashion!
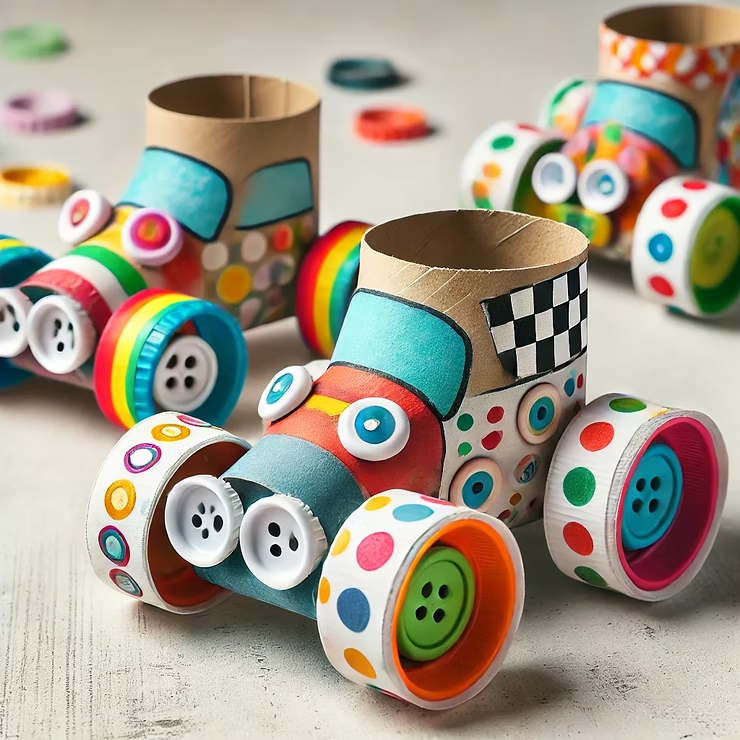
7. Paper Roll Cars
Materials Needed:
Toilet paper or paper towel rolls
Bottle caps or buttons (for wheels)
Paint, markers
Glue, scissors
Instructions:
Cut the paper roll to the size you want for your car’s body.
Paint and decorate the roll to give it color and design. You can make it look like a race car, police car, or any type of vehicle your child likes.
Glue the bottle caps or buttons to the sides of the roll as wheels.
Let everything dry, and then your child can play with their new recycled toy cars!
Why It’s Great: This is a fantastic craft for kids who love cars and vehicles. It’s simple, fun, and shows how everyday items can be turned into toys.
Conclusion
Recycled crafts for kids are not only fun and educational, but they also help instill an important lesson in sustainability. By repurposing everyday materials like toilet paper rolls, bottle caps, and plastic bottles, kids can create something beautiful while learning about the environment and the value of reusing. Whether it’s making animals from toilet paper rolls or creating a cardboard box city, these easy recycled crafts are sure to keep kids entertained and inspired.
Next time you’re looking for a creative way to spend an afternoon with your kids, try one of these fun and simple recycled craft projects. Not only will they have a blast creating their own art, but they’ll also gain an appreciation for recycling and eco-friendly practices.
So, get your crafting supplies ready and let the creativity flow!
Cheshvan, the quiet month in the Jewish calendar, is a wonderful time for meaningful kids’ crafts that celebrate themes like rain, renewal, and nature. Even without holidays, Cheshvan crafts for kids bring valuable lessons to life with fun, hands-on projects that make this reflective season special.
Craft Ideas
“Rainy Day Raindrop Art”
Create a rain-themed artwork inspired by Cheshvan’s association with rain and the beginning of Israel’s rainy season.
Materials: Blue construction paper, white chalk or paint, glitter, cotton balls for clouds.
Instructions: Guide kids to draw raindrops with chalk or paint, adding glitter for sparkle. Use cotton balls as clouds.
Learning Tie-In: Discuss the significance of rain in Israel and the symbolism of water in Judaism.
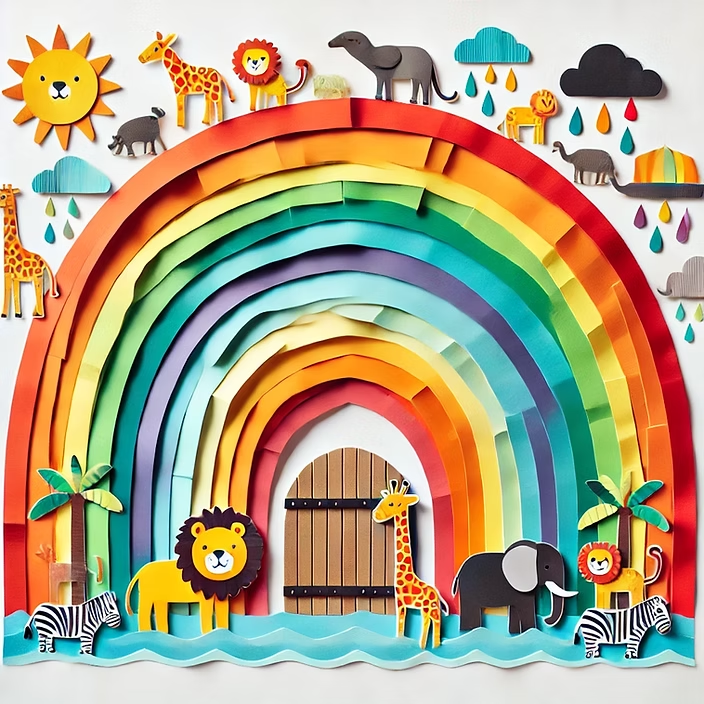
“Rainbow Promise Collage”
A rainbow-themed collage symbolizing Hashem’s promise after the flood.
Materials: Colored paper, glue, scissors, stickers or drawings of animals (representing Noach’s teiva).
Instructions: Help kids cut and arrange colors to form a rainbow and add animal stickers below.
Learning Tie-In: Discuss Noah’s Ark and the connection between Cheshvan and the flood story, focusing on themes of promise and renewal.
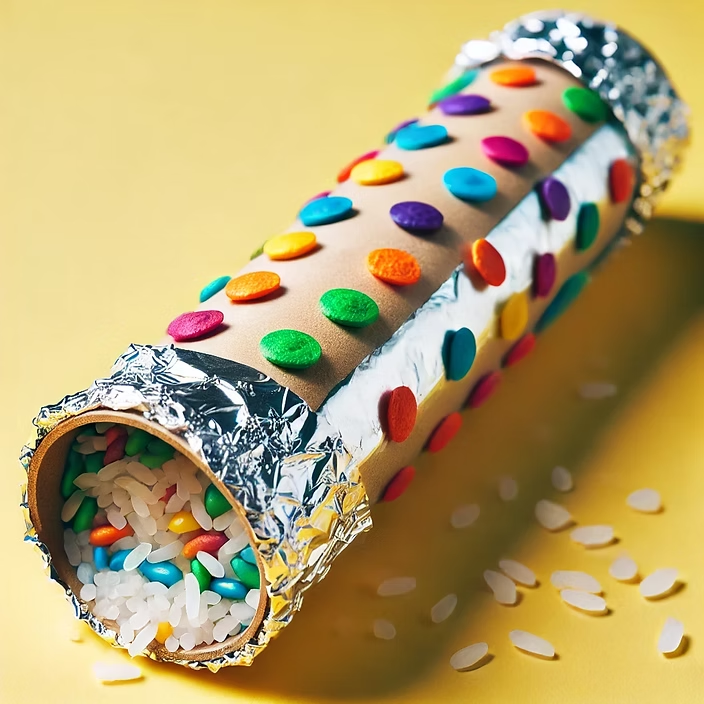
“Mini Rain Sticks”
Make a rain stick as a reminder of Cheshvan’s rainy season.
Materials: Paper towel rolls, rice or beans, aluminum foil, tape, markers for decoration.
Instructions: Fill the tube with foil and rice or beans, sealing both ends. Kids can shake it to mimic the sound of rain.
Learning Tie-In: Discuss why we need rain and the idea of being thankful for the season’s blessings.
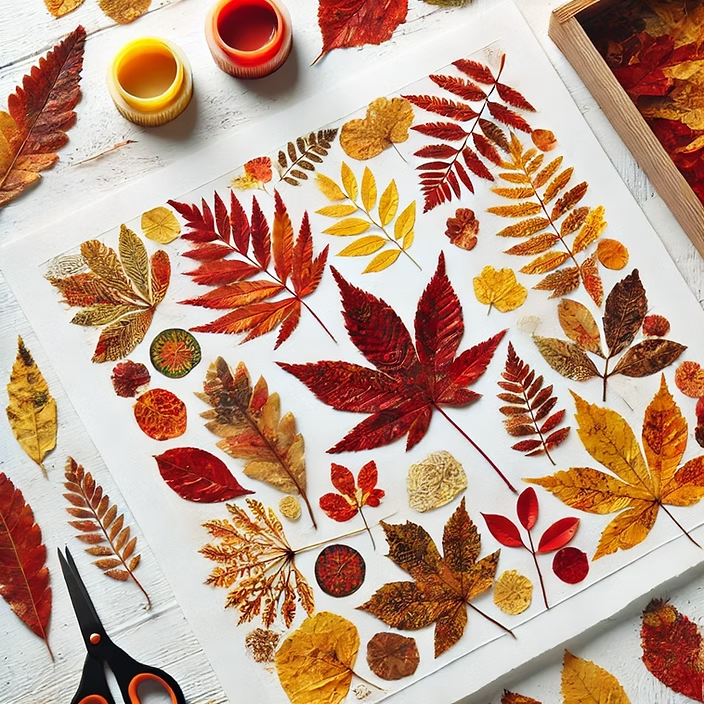
“Leaf-Pressed Artwork”
Create art using pressed leaves, celebrating fall’s beauty in Cheshvan.
Materials: Fallen leaves, heavy books for pressing, glue, paper.
Instructions: Press leaves and then glue them onto paper to create designs.
Learning Tie-In: Talk about appreciating nature and the changing seasons, which Cheshvan brings.
If you’ve ever watched a preschooler’s eyes light up over something as simple as a bright red ball or a vibrant red crayon, you know that colors have an undeniable magic! Teaching colors is one of the first steps in early learning, and what better way to start than with the color red? Whether you’re a teacher or a parent looking to introduce a little more fun into learning, these activities are easy, engaging, and perfect for little learners.
Let’s dive into some of the most enjoyable and educational color red activities for preschoolers that will make them giggle, play, and learn at the same time!
Why Teaching Colors Is Important in Early Childhood
Before we jump into the activities, let’s take a moment to think about why colors are so essential. Recognizing and naming colors is one of the first ways preschoolers categorize their world. It helps them describe what they see, express their preferences, and communicate. Plus, learning colors builds observation skills and even enhances their language development. With that in mind, here’s a lineup of red activities that are as fun as they are educational!
Engaging Red Activities for Preschoolers
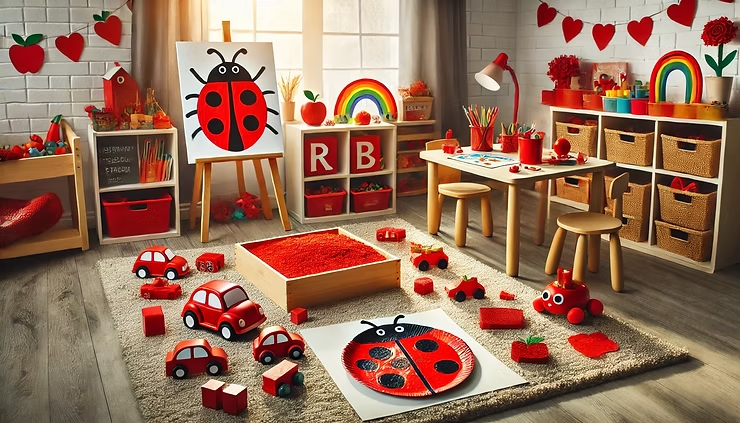
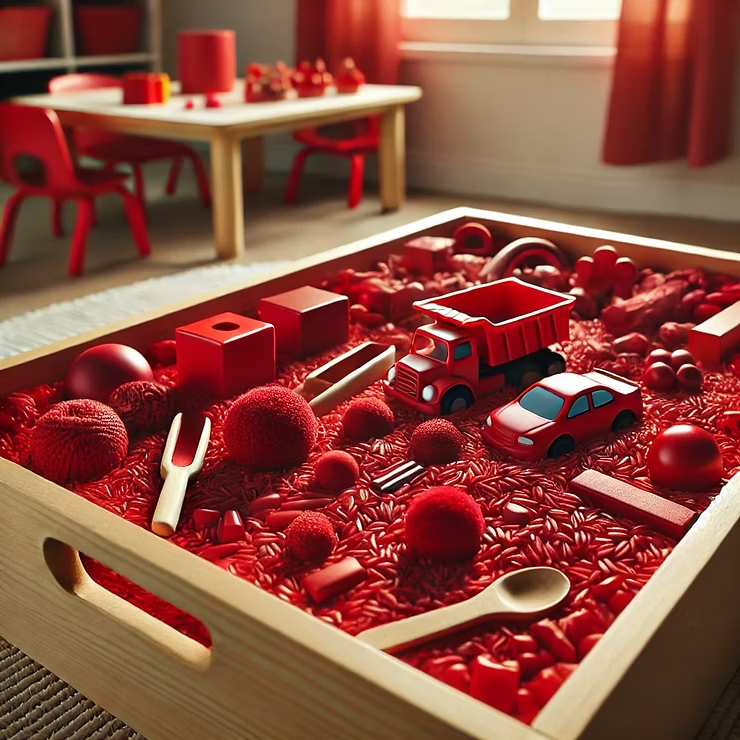
Red-Themed Sensory Bins
Sensory bins are always a huge hit! There’s something about digging through textures and finding hidden surprises that fascinates young kids. Here’s an easy and fun sensory bin setup focused on the color red:
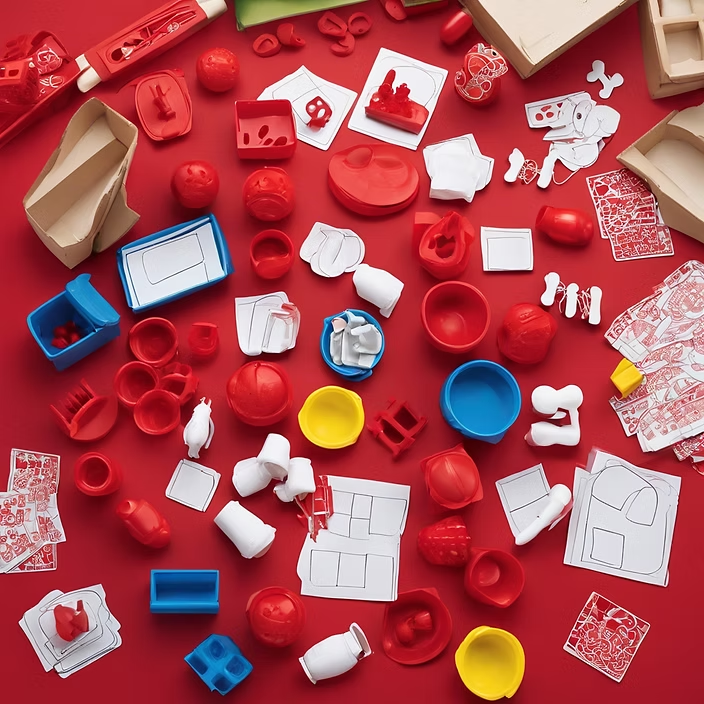
What You’ll Need: Red rice, red pompoms, red toy cars, red blocks, and any other red trinkets you can find.
How to Play: Fill a container with red rice (you can dye white rice with food coloring if needed) and toss in red toys. Let your preschooler dig, scoop, and discover as they talk about the different items in the bin. Ask them questions like, “Can you find the red car?” or “How many red blocks can you spot?”
This activity not only helps kids learn the color red but also builds their fine motor skills and sensory processing abilities.
Crafting with Red Colors
Craft time is a fantastic opportunity for creativity! With just a few simple supplies, you can make red-themed crafts that will have preschoolers totally engaged.
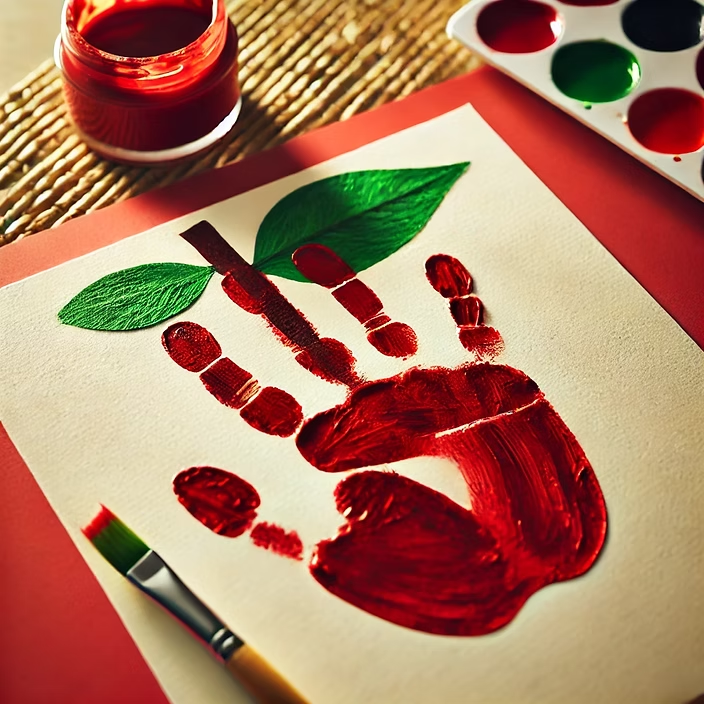
Red Handprint Apples: Dip hands in red paint and press them onto paper to make red apple handprints! Draw a little stem and leaf to complete the look. This craft is a keepsake and a fun way to talk about colors.
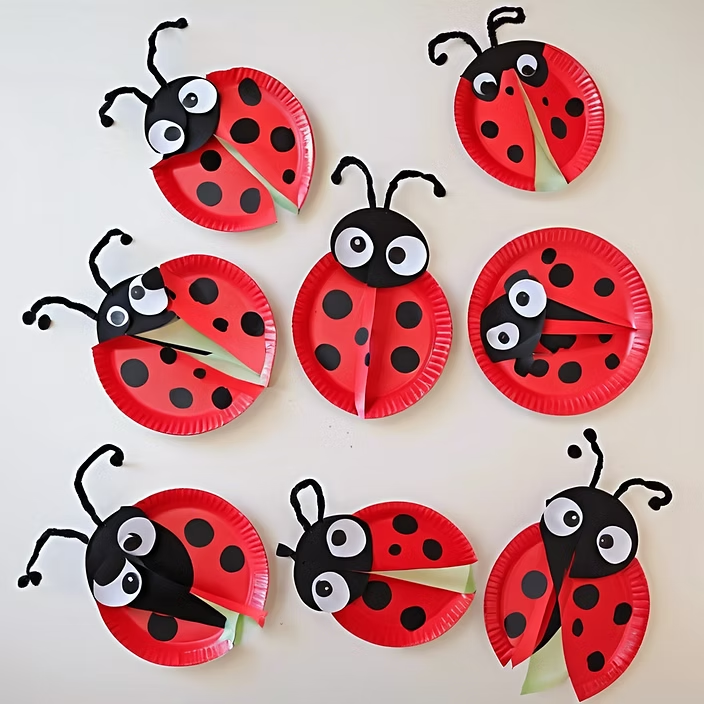
Paper Plate Ladybugs: Grab a paper plate, red paint, black construction paper, and googly eyes. Paint the plate red and add black spots, making a cute little ladybug. Preschoolers love these, and it’s a chance to talk about bugs, too!
These crafts make the color red stick in their minds, and they’ll proudly show off their creations to everyone!
Red Sorting and Matching Games
Sorting and matching are fantastic activities for color recognition, and they couldn’t be simpler to set up!
Red and Not Red Sorting Game: Gather objects from around the house or classroom, such as toys, blocks, and everyday items in various colors. Let your preschooler sort them into “red” and “not red” piles. As they place each item, encourage them to say the color out loud. This repetition helps them remember!
Red Matching Pairs: Gather pairs of small red items (like blocks, toy animals, or crayons) and mix them with a few non-red items. Challenge your preschooler to match the red items. This helps with visual discrimination and is also a fun memory game.
Tips for Making Color Learning Fun
Praise Their Progress: Little ones love to feel accomplished, so cheer them on as they correctly identify or sort red items.
Use Everyday Opportunities: Ask them to point out red items when you’re out for a walk or at the grocery store. This real-life application makes learning more meaningful.
Make It a Game: Turn color-learning activities into playful competitions or scavenger hunts to keep them engaged.
Learning colors can feel like play when it’s done with intention and fun activities. And remember, patience is key. Every time they recognize a color correctly, they’re building a skill that will support their future learning.
FAQ About Color Activities for Preschoolers
Q: When should I start teaching colors to my child?
A: You can introduce colors as early as toddlerhood, but around age 3 is a great time to start specific color activities. At this age, they’re naturally curious and ready to start sorting and naming colors.
Q: How can I make sure my child doesn’t get bored?
A: Variety is key! Try different activities like sorting, crafting, and sensory play. Mix it up with real-life examples, like pointing out red cars or red apples in daily routines.
Teaching colors to preschoolers doesn’t need to be complicated. With these simple, hands-on activities, your little one will soon be a pro at spotting and naming red in no time. Enjoy these playful learning moments, and watch your preschooler’s confidence grow with every color they learn!
Have your own creative ideas for teaching colors? Share them in the comments below – we’d love to hear from you! And don’t forget to subscribe for more engaging preschool activities and learning inspiration!
Parshas Vayeira is rich with stories and themes that make it a wonderful teaching opportunity. This Torah portion covers significant events, including the visit of the three angels to Avraham and Sarah, the promise of a child, and Avraham’s test of faith. A sensory bin can help bring these stories to life, allowing children to explore the parsha in a hands-on way. Let’s dive into some sensory bin ideas that capture these themes in a fun, interactive way for kids!
Materials Needed for the Sensory Bin
For a sensory bin that reflects Parshas Vayeira, gather the following materials:
Base material: Sand, gravel, or dry rice (to represent the desert and wilderness setting)
Figurines: Small toy figures of Avraham, Sarah, and angels
Mini tents or fabric: To represent Avraham and Sarah’s tent
Small bowls or toy dishes: To depict the meal prepared for the angels
Toy animals: Such as sheep or camels to represent Avraham’s livestock
Tray or shallow bin: To hold all the materials
These simple items can easily be found around the house or in local stores, creating an inviting setup for sensory exploration.
Step-by-Step Instructions for Setting Up the Sensory Bin
Create the Desert Landscape: Begin by filling the shallow bin with sand, gravel, or dry rice to form the base of the desert landscape where Avraham and Sarah lived.
Set Up the Tent: Place a mini tent or drape a small piece of fabric over sticks to represent Avraham and Sarah’s tent, where the angels visited.
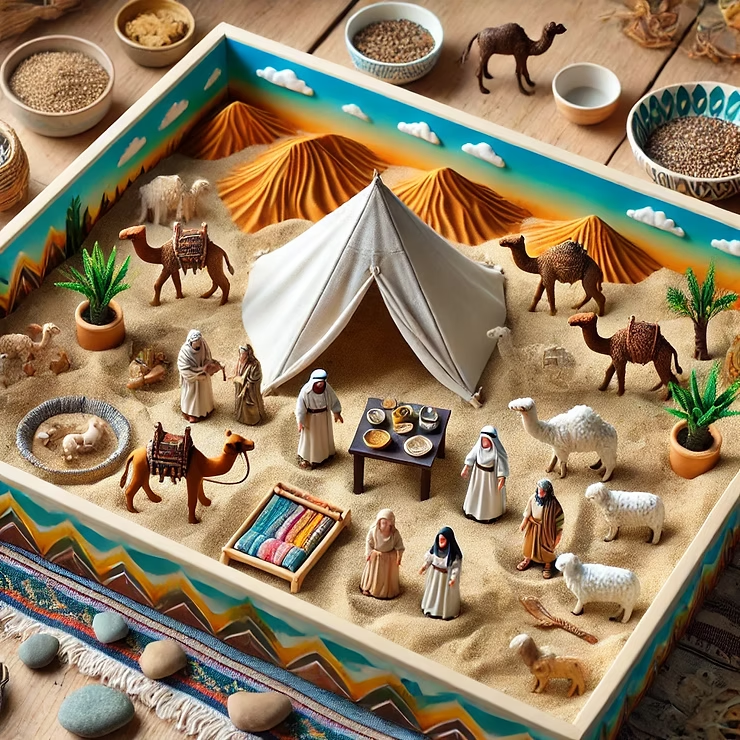
Add Figurines for Avraham, Sarah, and the Angels: Arrange small figurines in or near the tent to depict the scene where the three angels came to share the good news of Yitzchak’s birth.
Add Toy Animals and Bowls: Place a few toy animals like sheep or camels around the sensory bin, along with small bowls to represent the meal prepared for the angels.
Additional Props (Optional): For an extra touch, add small pieces of “firewood” (sticks or small twigs) and greenery to complete the sensory experience.
Learning Opportunities & Activities
Once your sensory bin is ready, explore these activities with your child to help them connect with Parshas Vayeira:
Storytelling with Figurines: Guide your child in using the figurines to retell the story of the angels visiting Avraham and Sarah. Encourage them to act out the moment when Sarah hears she’ll have a child, helping them understand the miracle and joy of that moment.
Symbolic Questions and Discussions: While your child explores the bin, ask questions to help deepen their understanding. For example: “What do you think Avraham and Sarah felt when the angels visited?” or “Why do you think God tested Avraham?”
Interactive Play with the Meal: Invite your child to “prepare a meal” for the angel figurines using the small dishes, simulating Avraham and Sarah’s hospitality. This can lead to a conversation about the importance of welcoming guests and being generous.
Conclusion
A Parshas Vayeira sensory bin is an exciting way to help children interact with the Torah portion and understand its key moments. Sensory bins are both educational and fun, making abstract themes accessible and memorable for young learners. Whether your child is recreating Avraham’s hospitality, the miracle of Yitzchak’s birth, or the test of faith, this activity offers a meaningful, hands-on way to connect with the Torah.
If you enjoyed this sensory bin idea, subscribe for more weekly Parsha-themed activities and resources to make learning engaging for your kids!